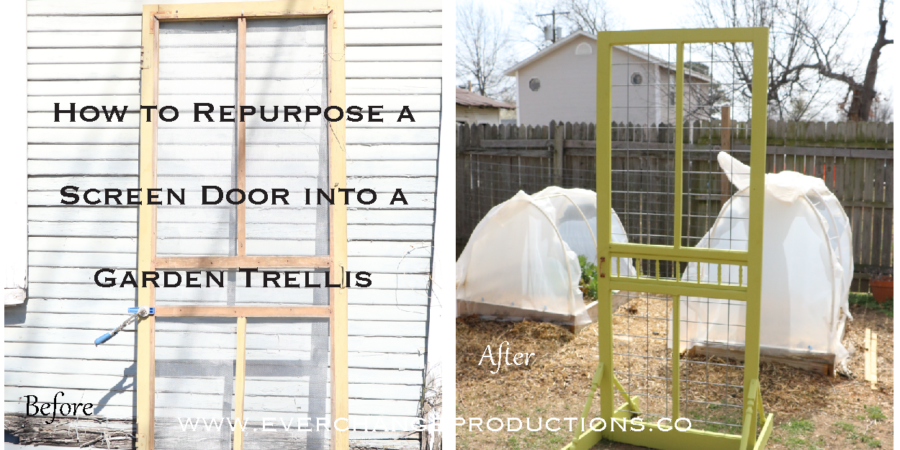
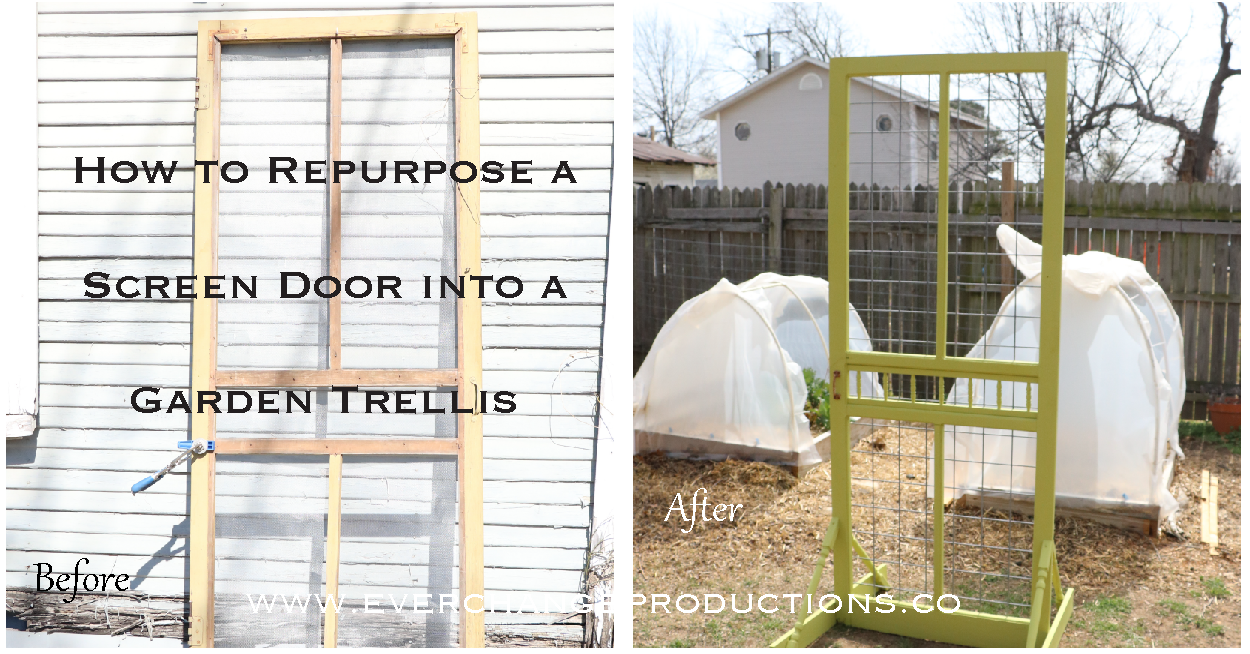
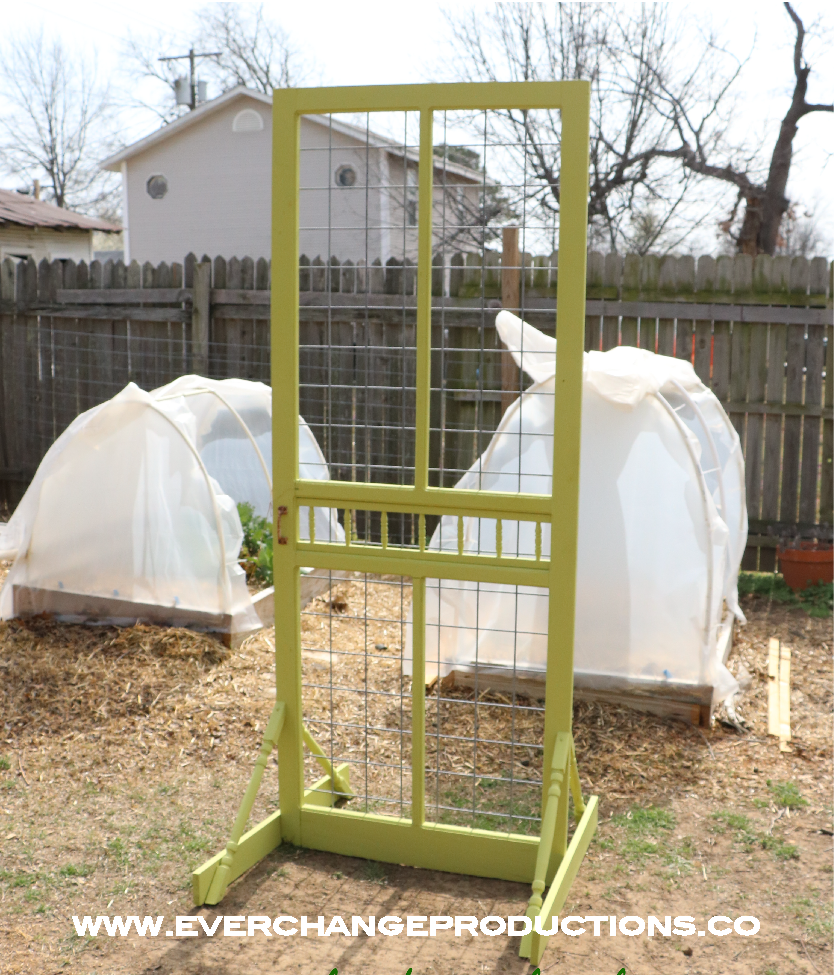
Wooden Trellis
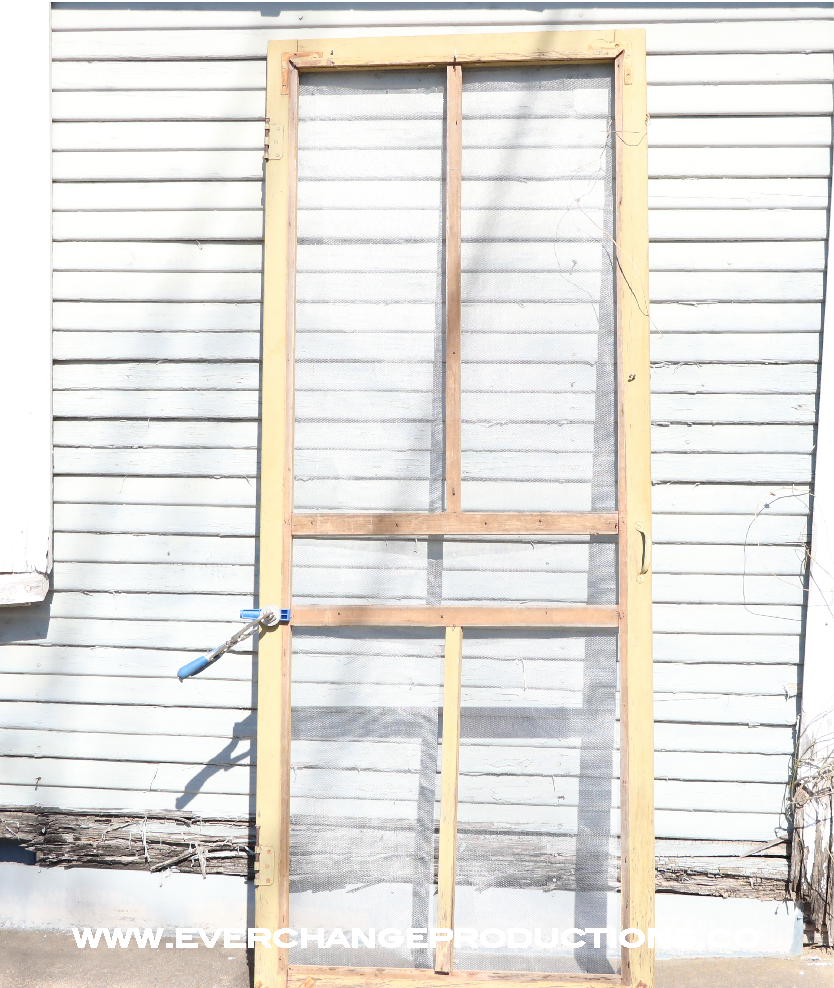
A garden trellis is required to complete any garden. Many vegetables including peas, cucumbers, tomatoes, luffas and many others, require a trellis to grow to their fullest ability. Sometimes buying a trellis can be expensive, but the garden is a great place to use repurposed items to keep inline with a natural look. With that thinking in mind, we knew when we found this screen door, it would make a perfect trellis and complete our garden.
When you have a lifestyle centered around repurposing items, some times it requires a bit of hunting to find that perfect item. However, occasionally, the perfect item finds you. It requires a different mindset and appreciation, but it brings in such a feeling of blessing. So often we’re obsessed with everything being new and shiny, but the biggest blessings in life are often free and it’s up to us see it’s worth.
Materials:
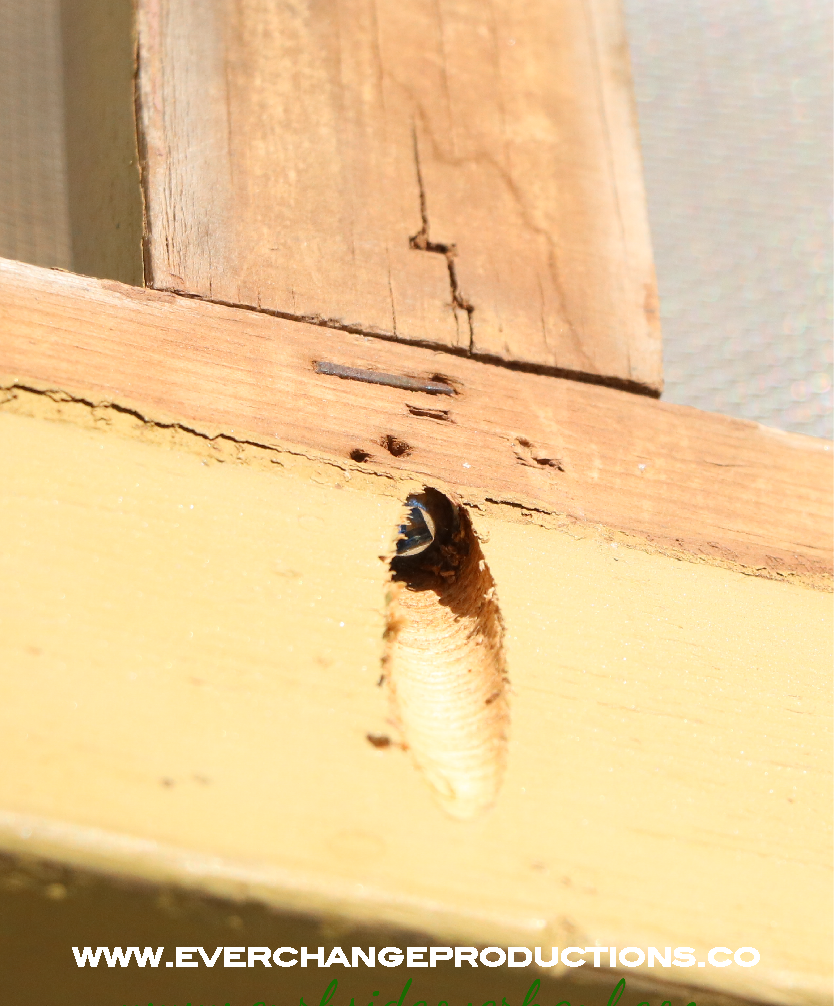
Step One: Remove Staples
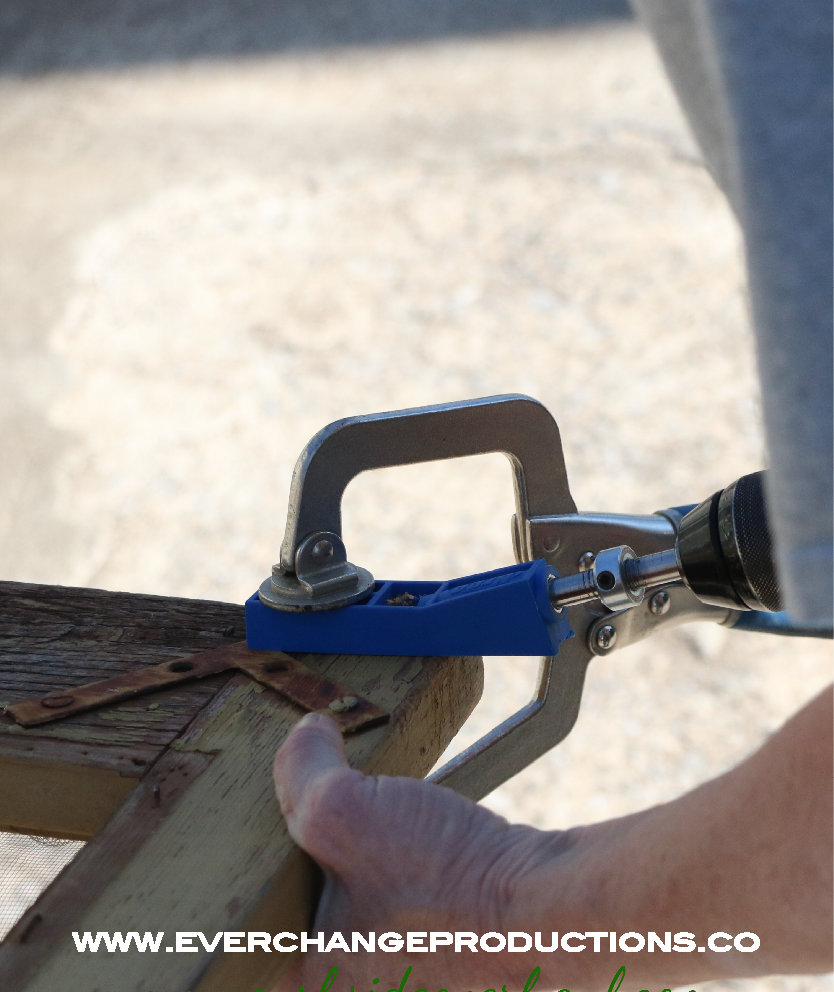
Step Two: Reinforce Structure
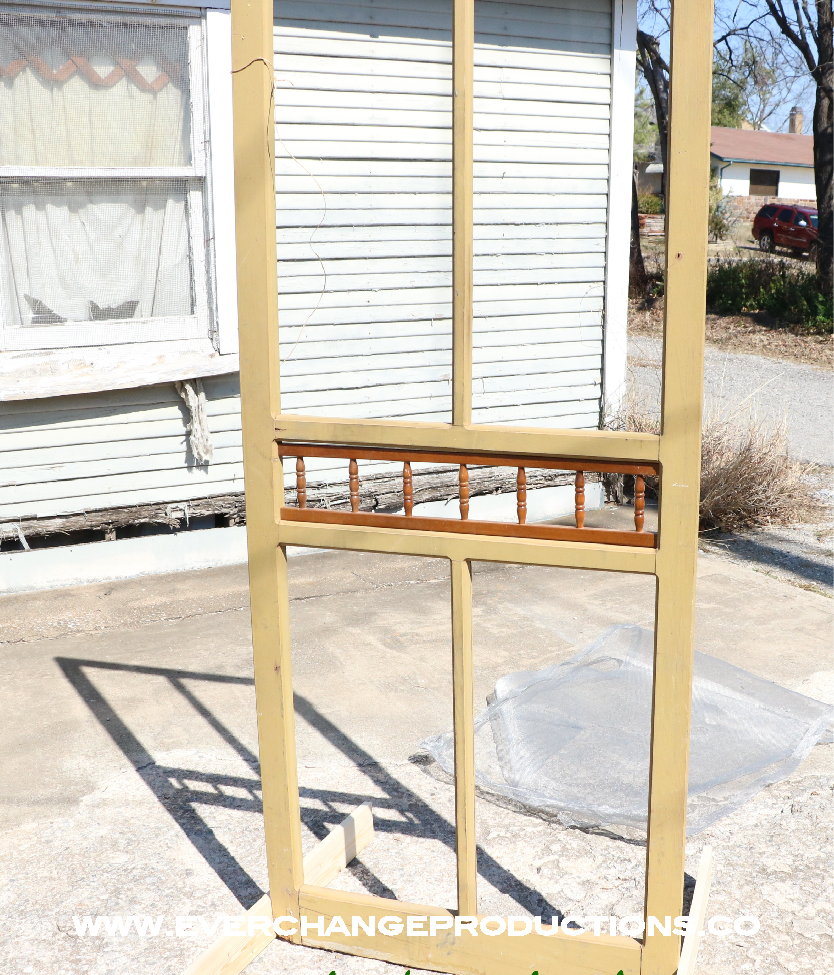
Step Three: Add Details
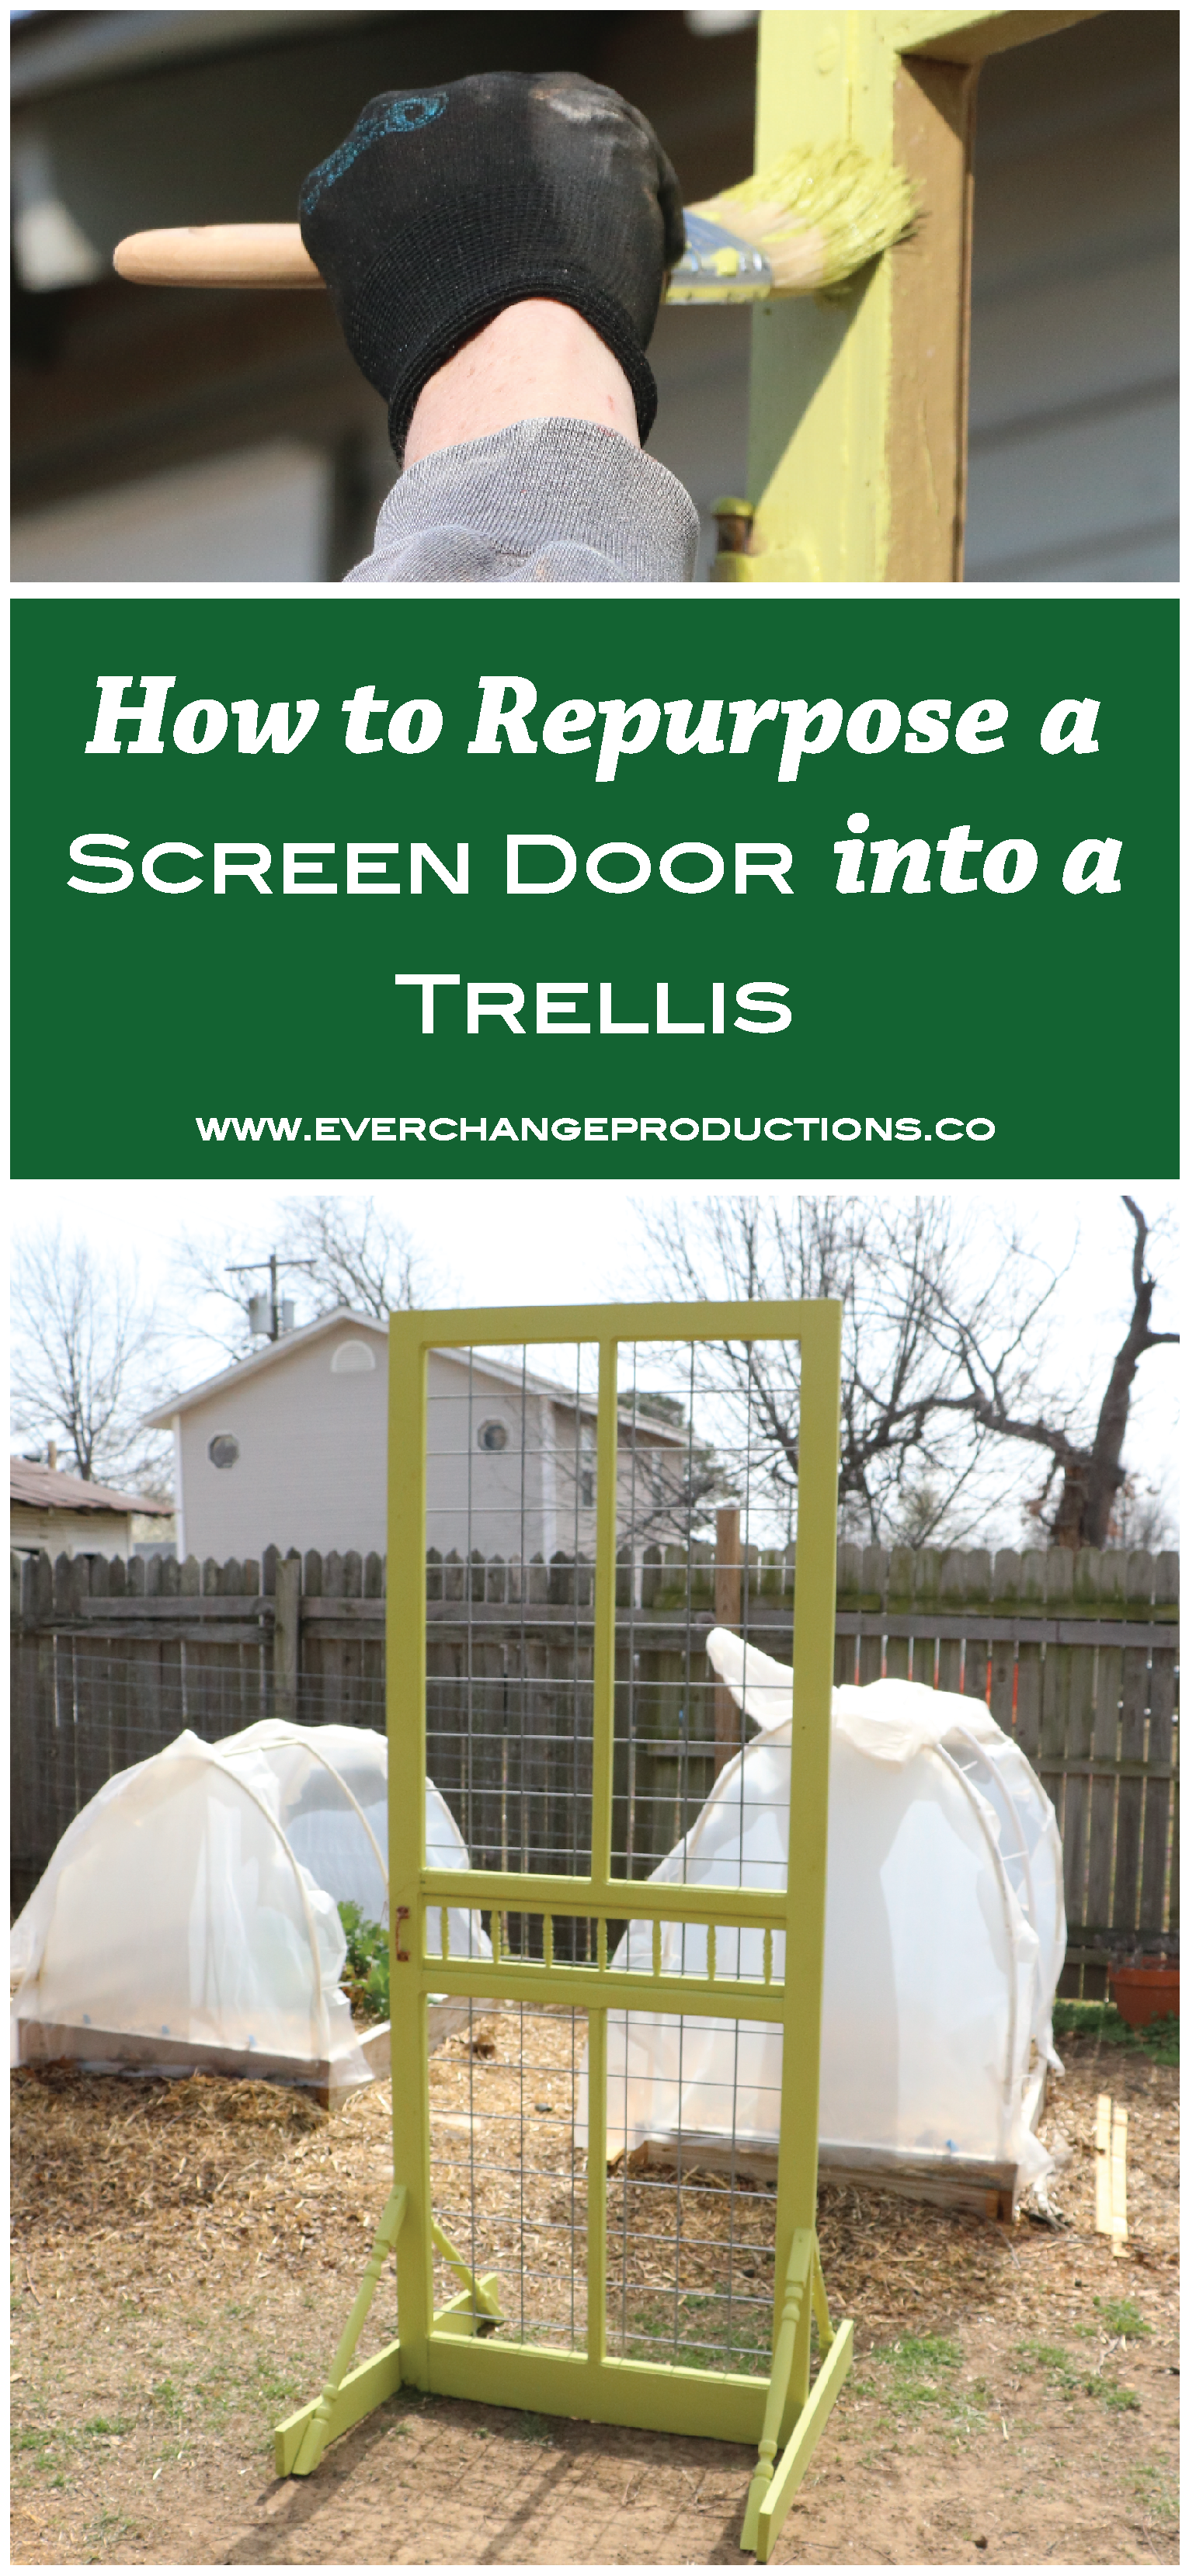
Step Four: Paint with One-Step Paint
Pick a color, any color of Amy Howard’s One-Step paint, paint your garden trellis and scrap wood for the stand.
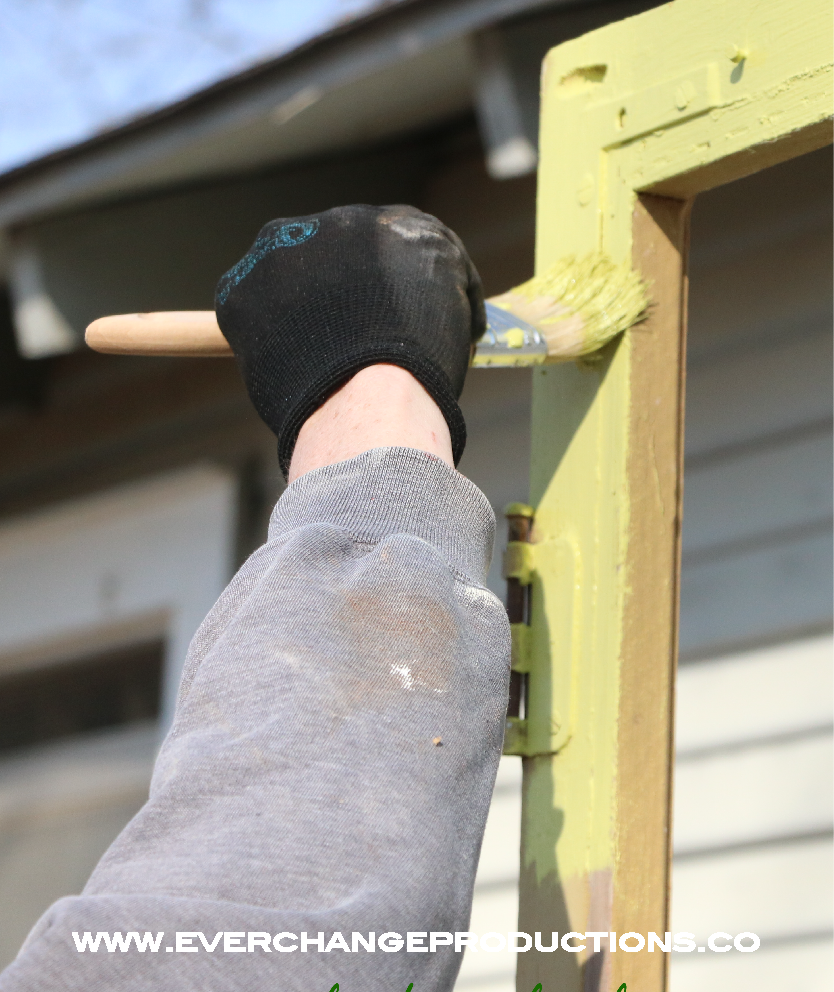
The chalk in chalk-based paint is heavy and it tends to settle to the bottom of the container. It is important mix it well before you start.
Turn the paint can upside down for at least 30 minutes or overnight if you can. This will get the chalk to start settling again. When you are ready to start, open the can and stir well. Stir until there are no more lumps and all of the wonderful chalky bits are pulled up from the bottom of the can. You can even use one of the paint stirrers on a drill.
One-Step Paint dries quickly, so stir the top of the paint with your brush from time to time to keep a film from forming while you paint, especially in the warmer months. Try to always work in long clean strokes with your brush for a more consistent finish.
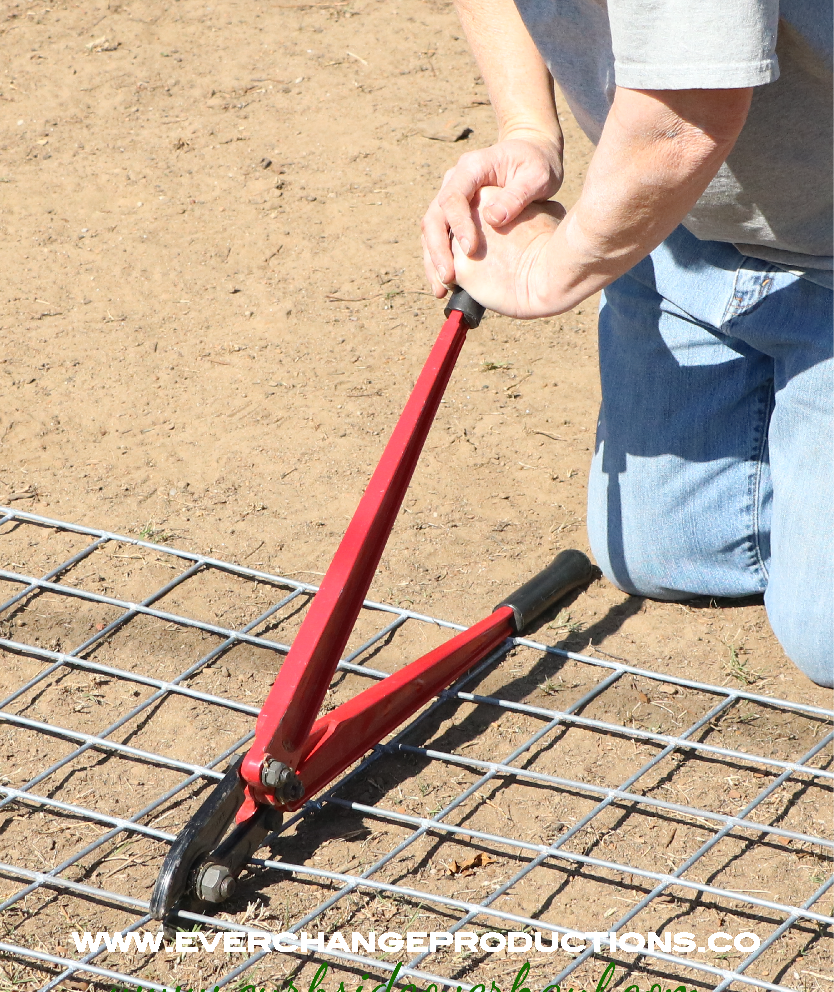
Step Five: Cut Fence
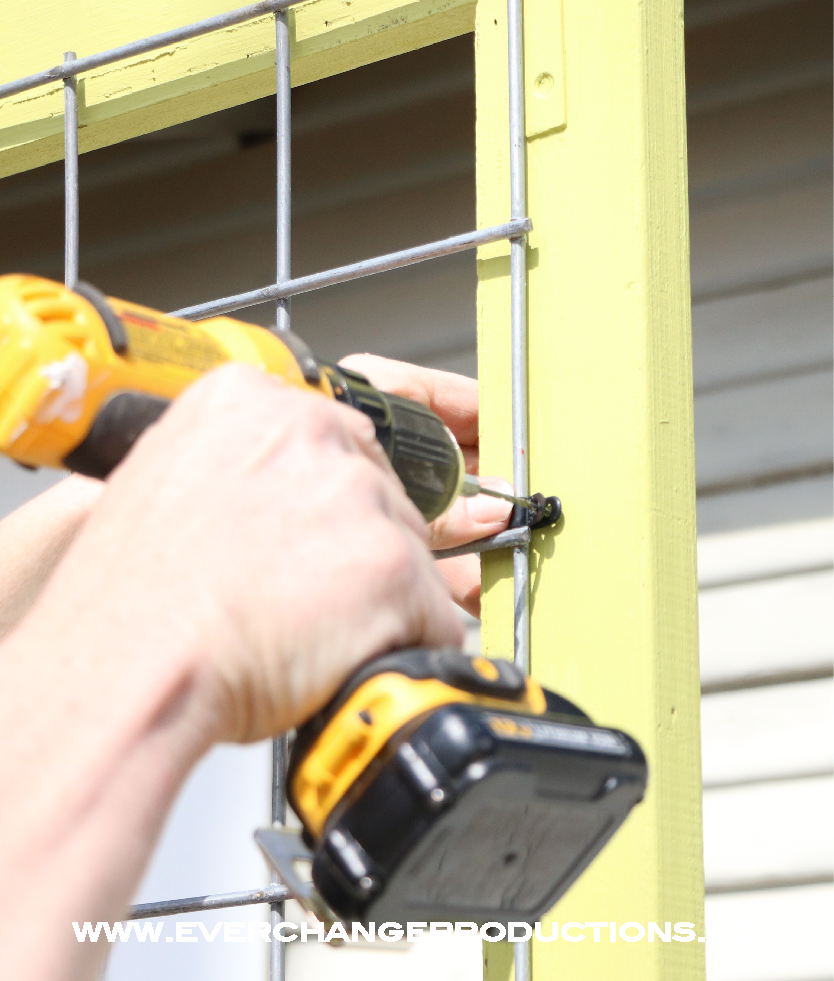
Step Six: Attach Fence Panel
Step Seven: Stabilize the Garden Trellis
With windy Oklahoma weather, we knew sturdy was a keyword. There is many ways to create a base for the garden trellis, so we got a couple of two-foot board to screw to the bottom. We found scrap table legs that we used to add an extra layer of sturdiness and reinforce the boards to the trellis structure.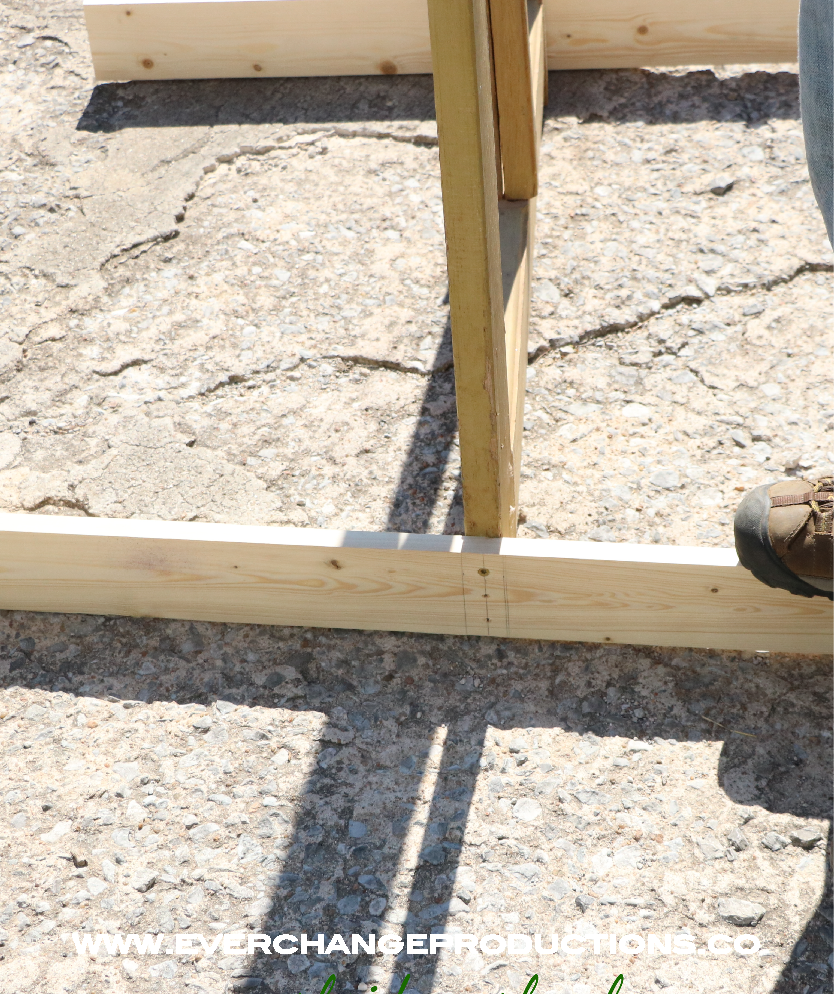
And there you have a completed garden trellis! Leave a comment below with your ideas to repurpose items into a trellis! You can also take a look at these other garden trellis ideas that you can make yourself!
Don’t forget to pin this project for later!