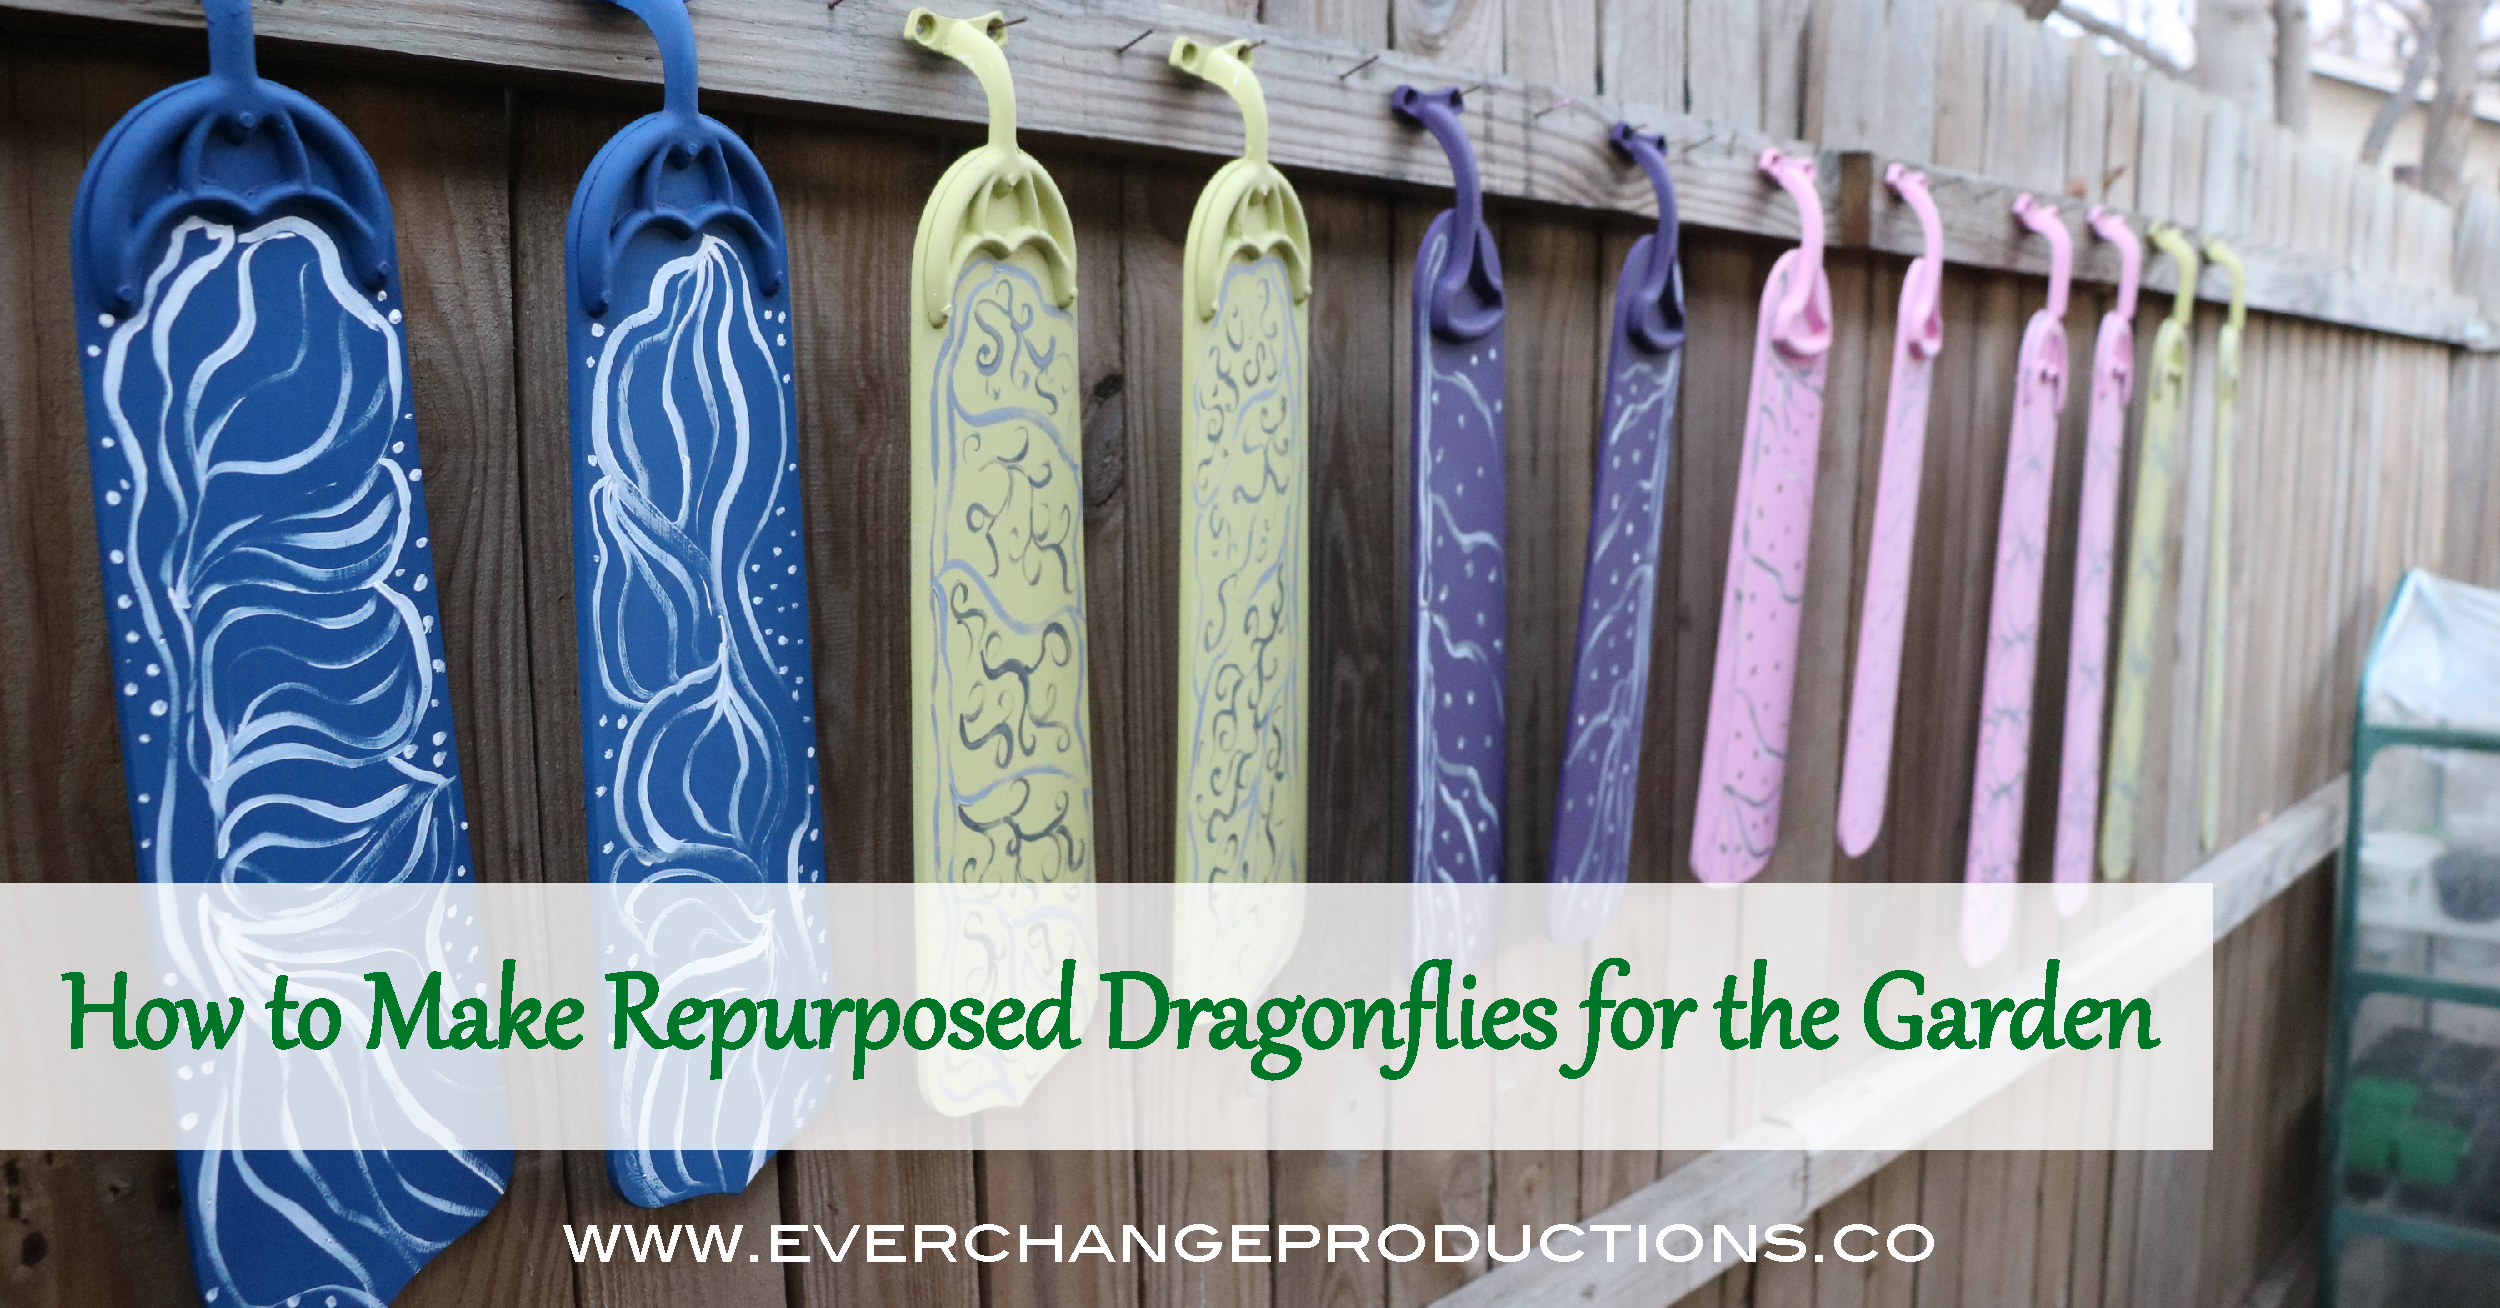
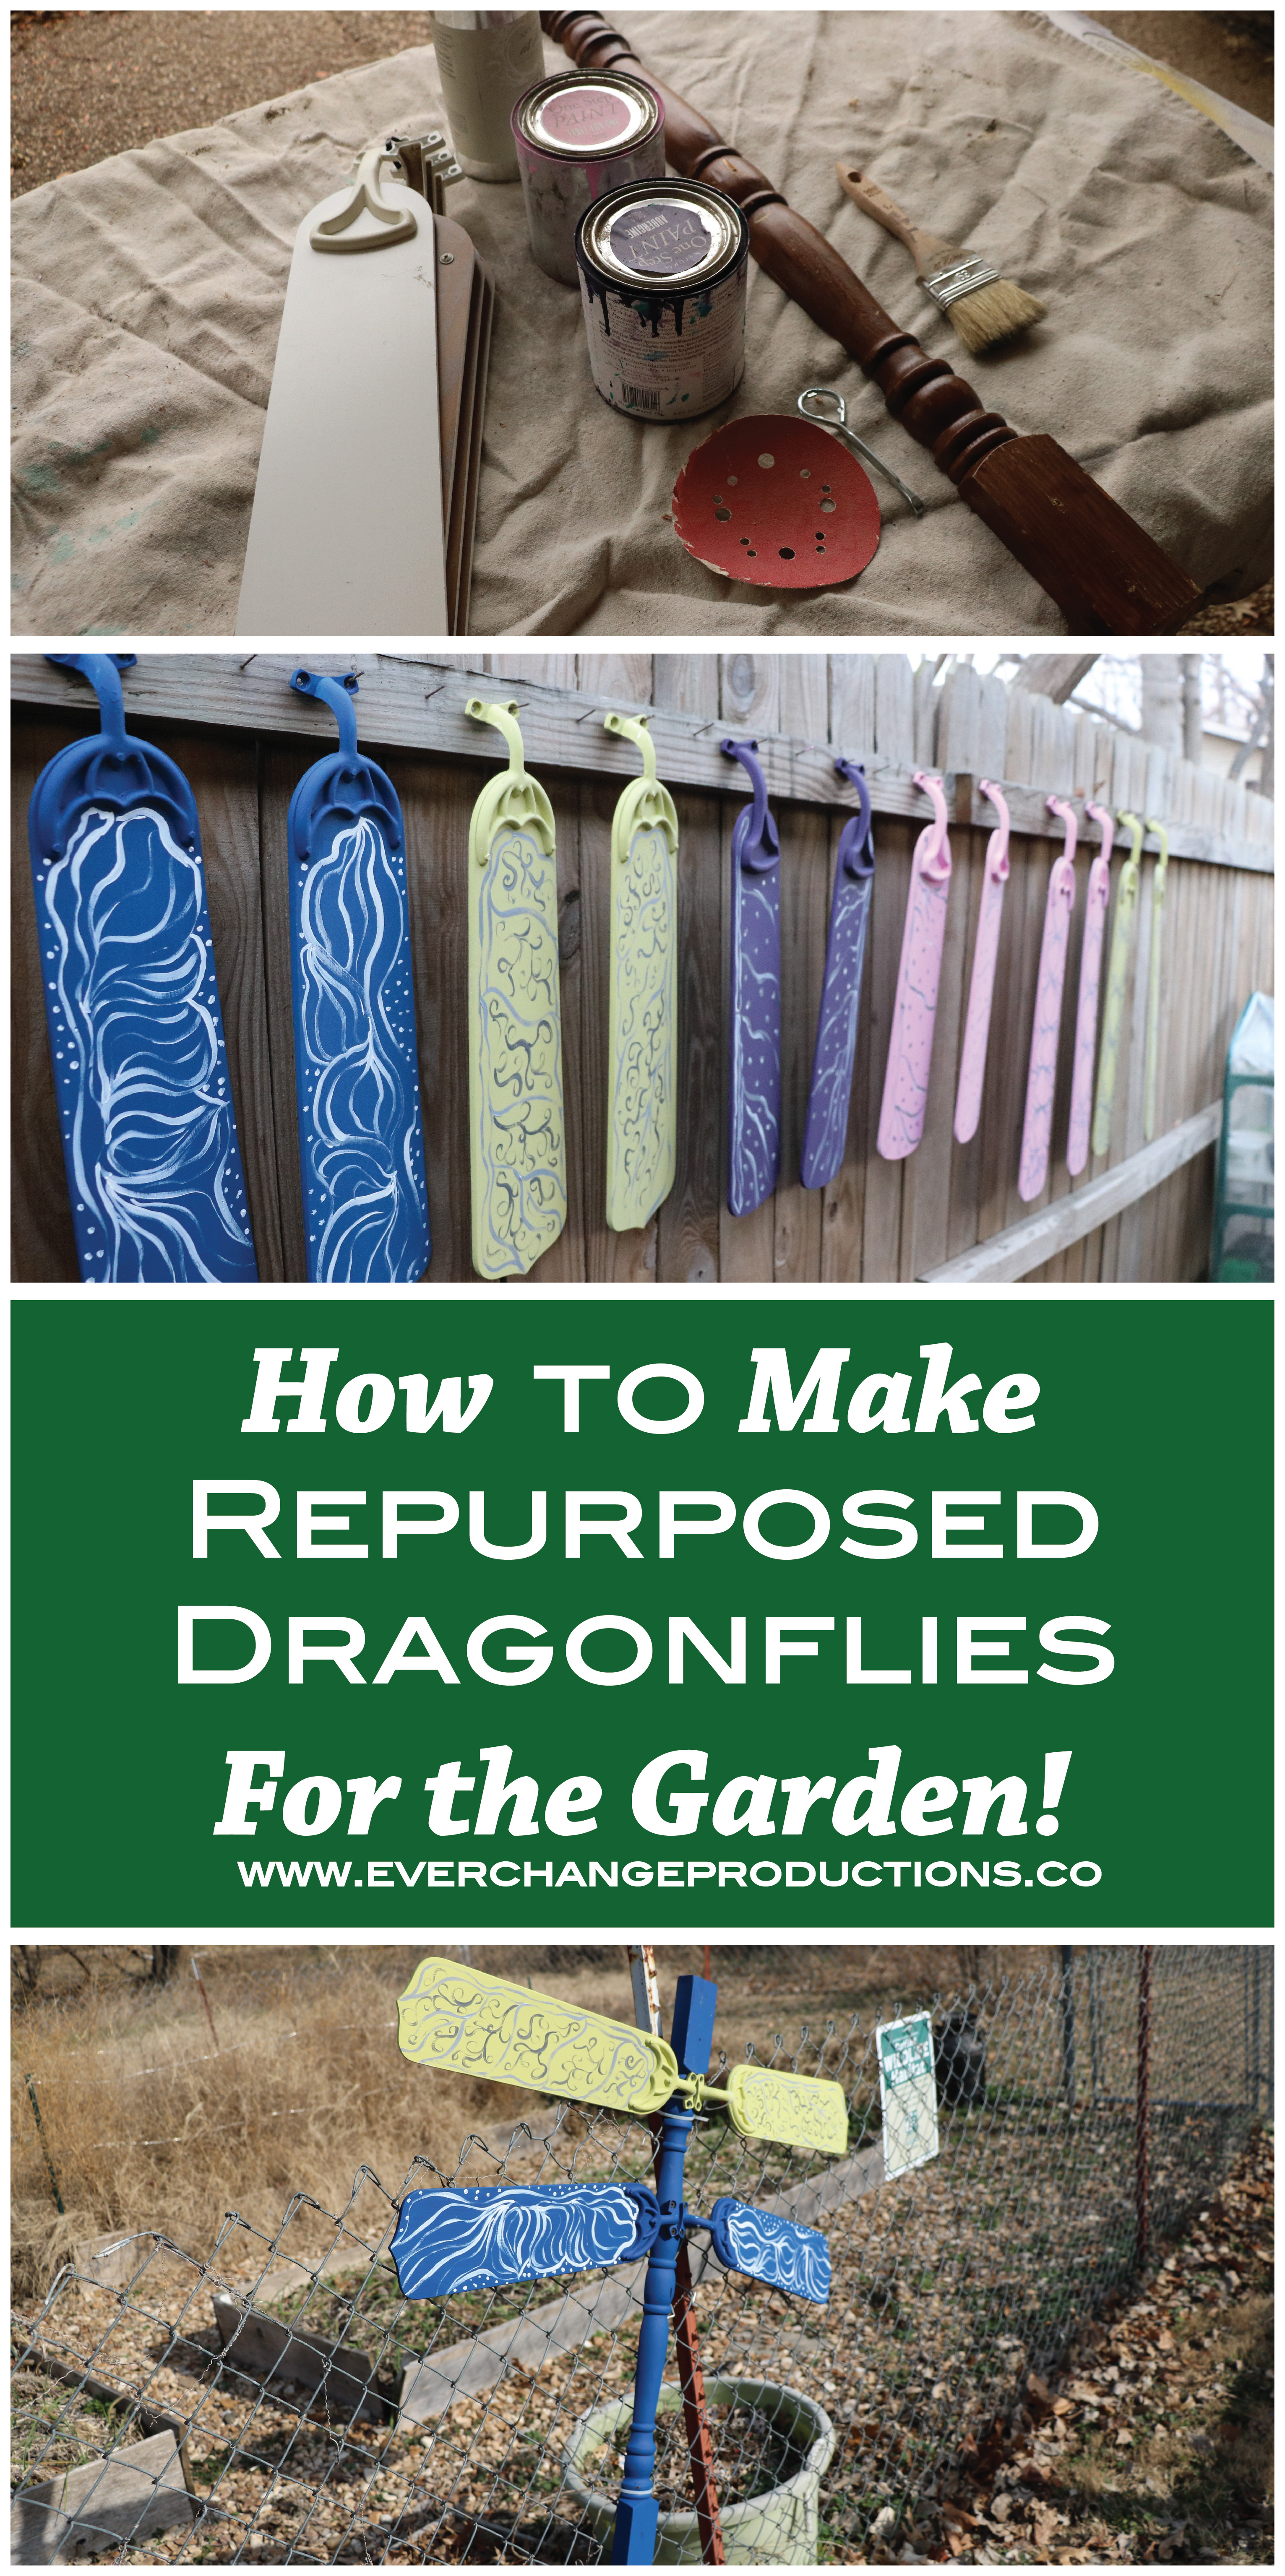
Fan Blade Dragonfly Yard Art
Got some fan blades from a broken ceiling fan? Don’t toss them just yet! You can give them a new life as a fan blade dragonfly!
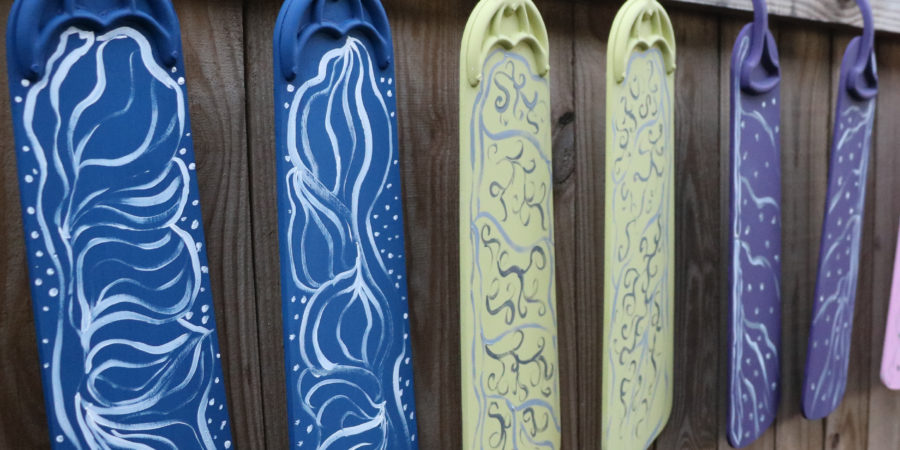
This past Christmas, I made dragonfly garden decor for my mother’s gift. She’s an avid gardener and she had seen them previously on Pinterest made with repurposed fan blades. She had some fan blades from a broken fan, so I took those along with some table legs and additional fan blades I found at Habitat for Humanity Restore in Tulsa to make her own set of dragonfly garden decor.
Repurposed Ceiling Fan Blades
The fan blade dragonfly is super easy to make, so I’ll show you what materials I used and process I followed so you can make your own.
This post does contain affiliate links.
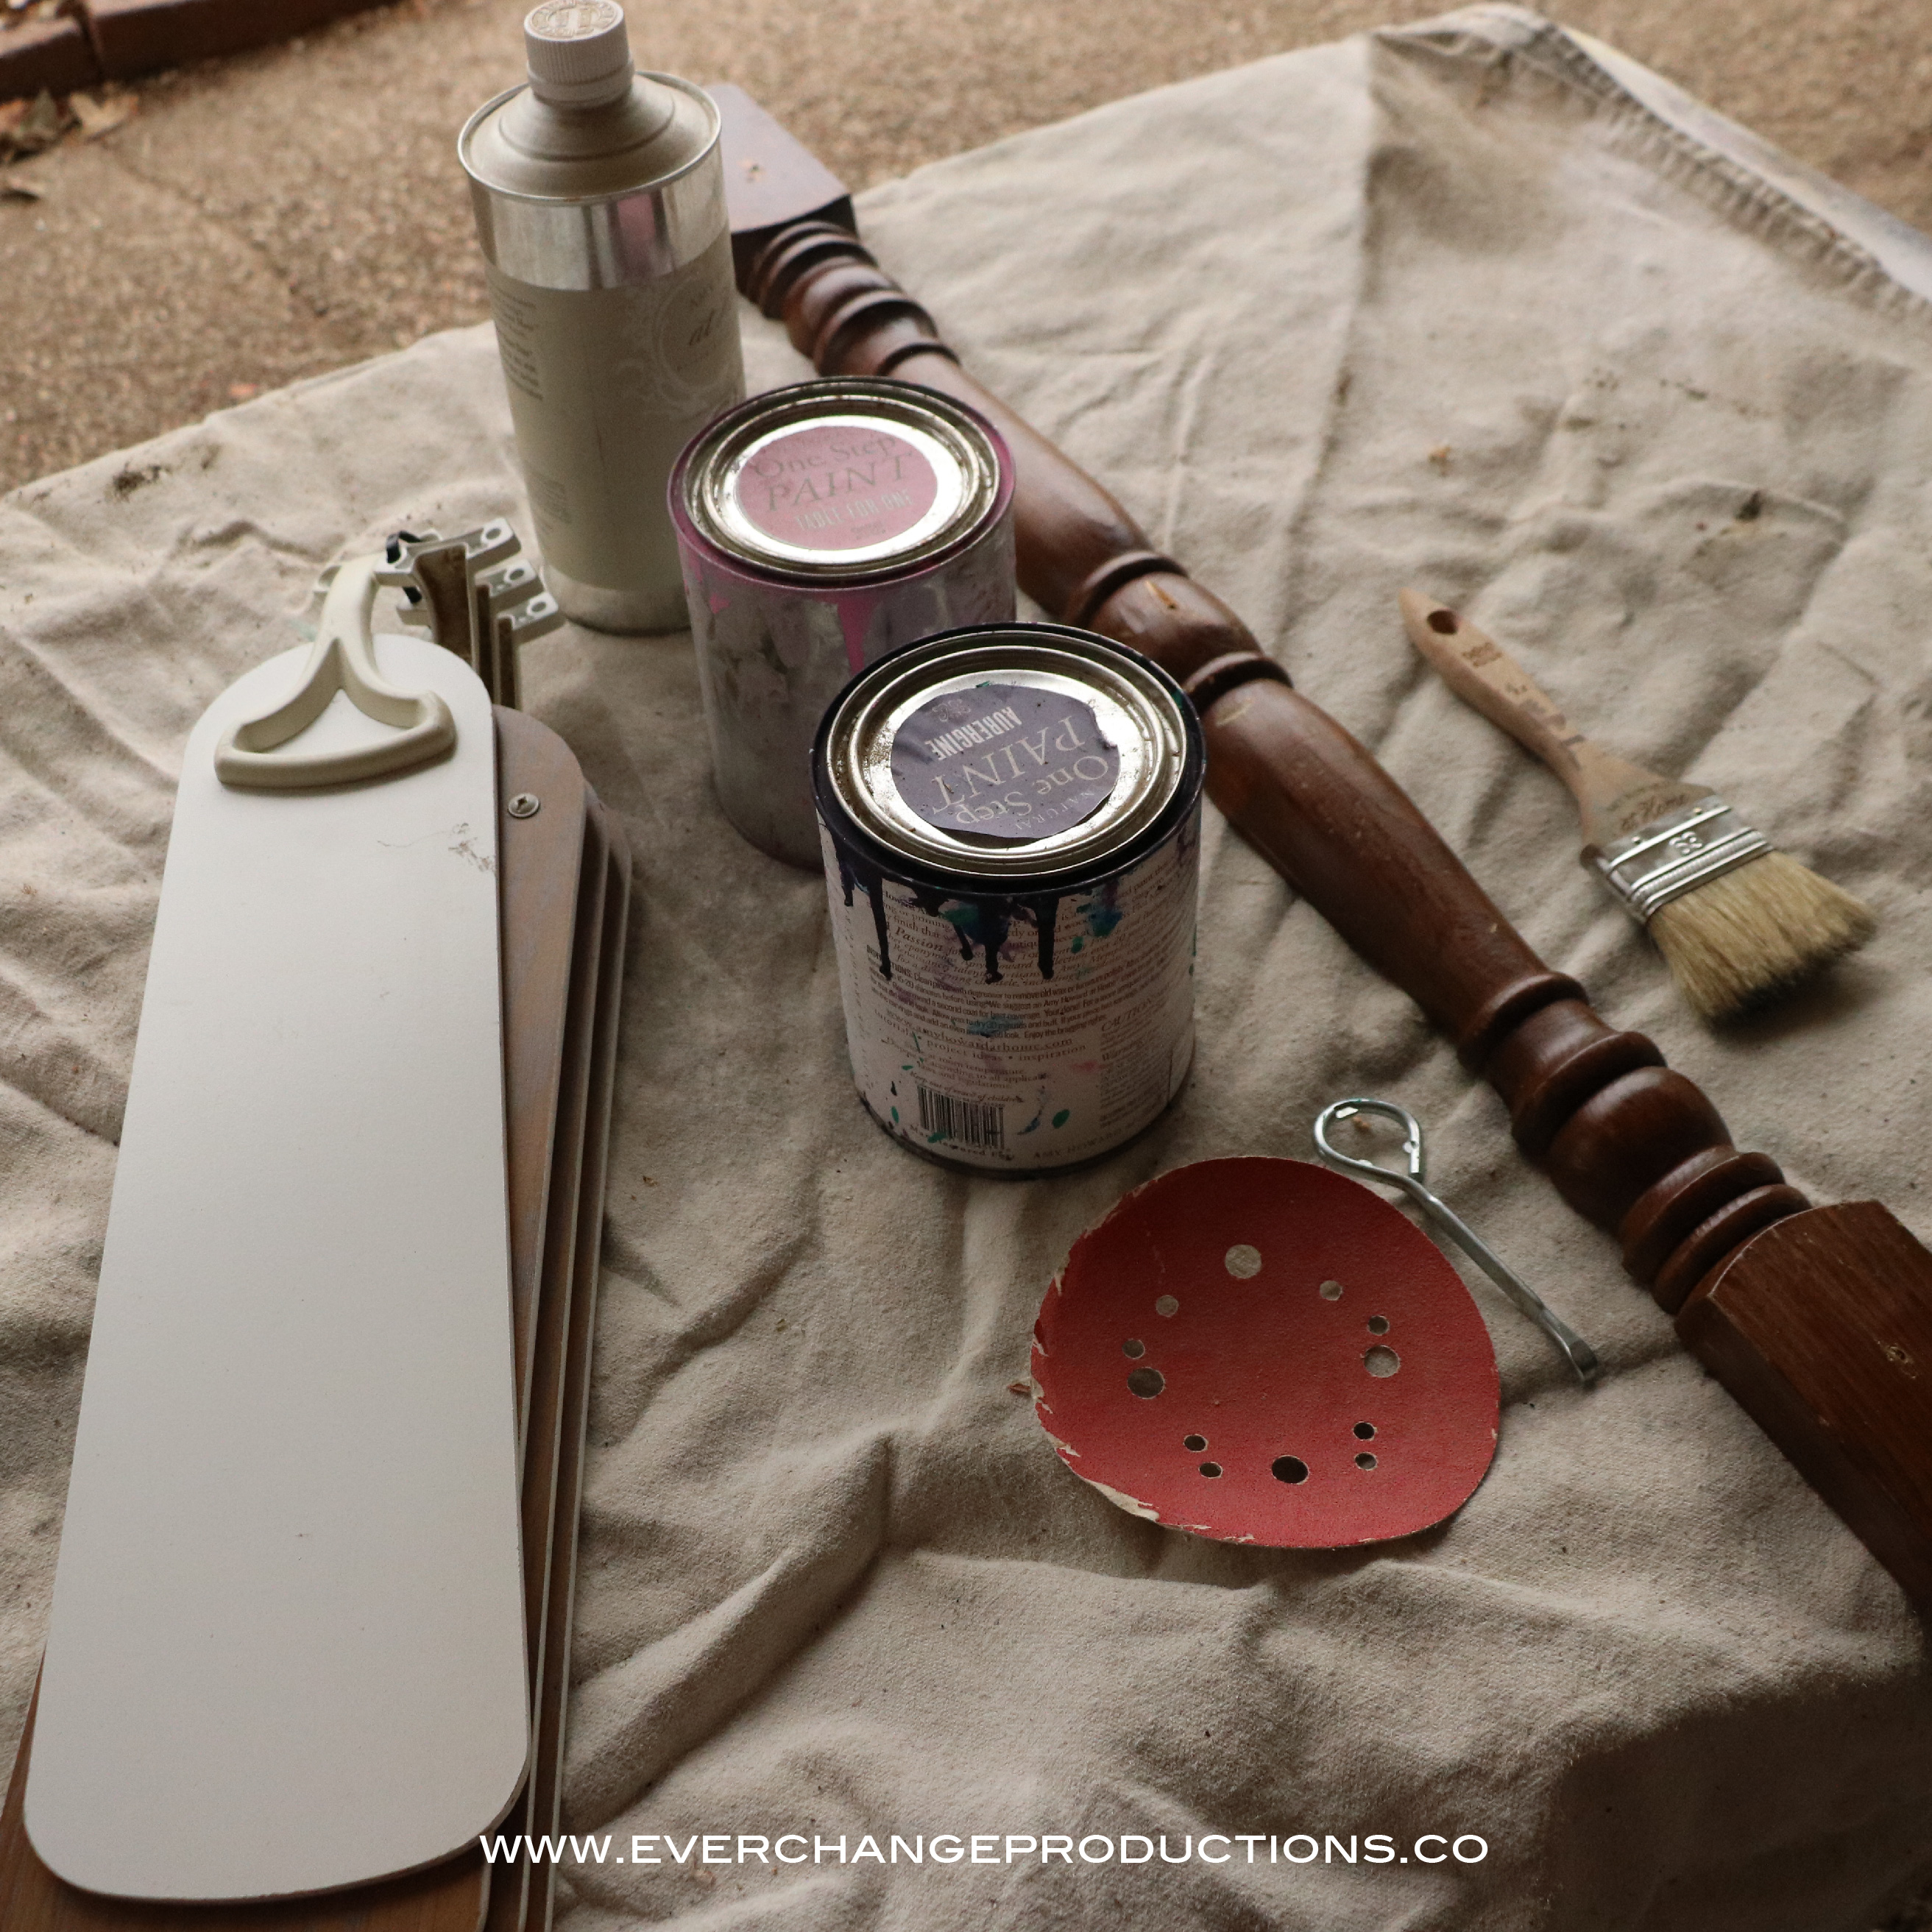
Fan Blade Dragonfly Materials Needed:
- Fan Blades for wings (I recommend shorter blades rather than longer for a sturdier design)
- Something for body (I used table legs, but something like spindles would be good too)
- Paint (I used Amy Howard Table for One, Lime Lime, American Dream and Aubergine Chalk-Based Paint)
- If you use this kind of paint, I also recommend using Amy Howard Clean Slate to clean the pieces.
- Sandpaper
- Screws (Sizes vary based on the thickness of your dragonfly body)
- Drill
Fan Blade Dragonfly Instructions
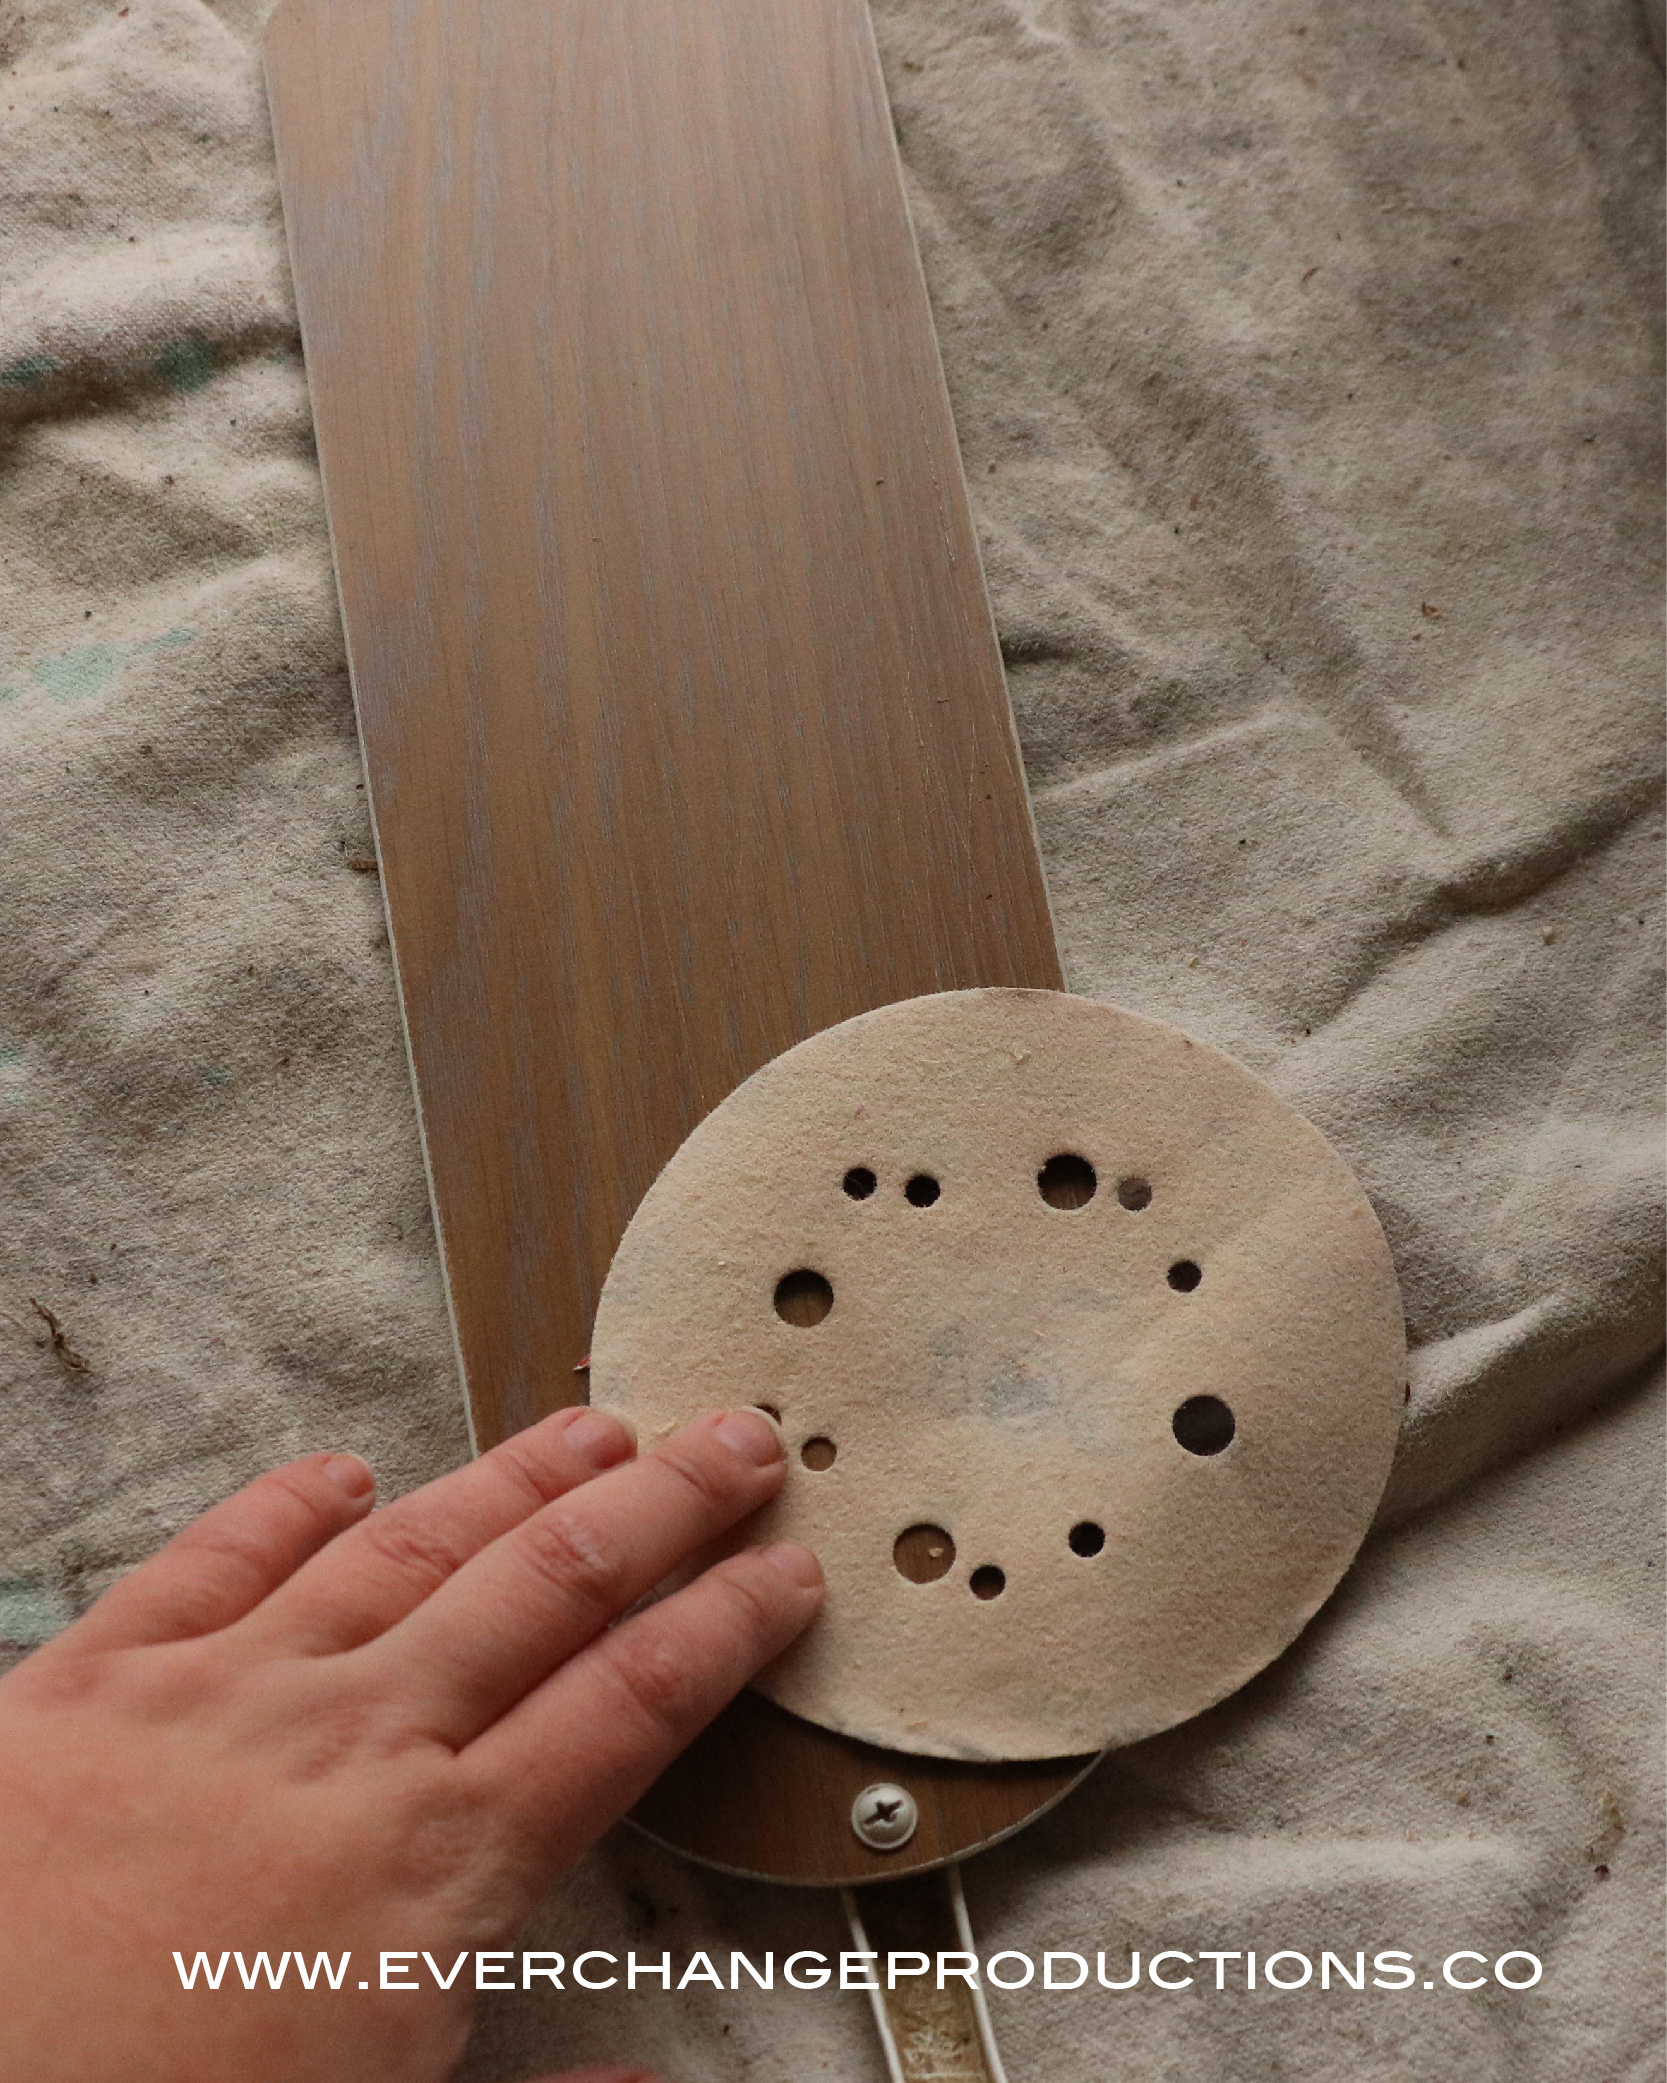
Step One: Sand the Fan Blades
Sand the pieces as best you can in every nook and cranny. My fan blades were mostly plastic or had a hard finish on them, so it was important to rough up the surface for the paint to adhere.
Step Two: Clean the Dragonfly Pieces
This is probably the most important step. If you fan blades have every been used, there’s a chance they’re very dusty. Where the hardware is set, there are many opportunities for trapped dust. Clean these fan blades as well as possible. This will allow the paint to stick best. Do the best for the pieces you got for the dragonfly body.
Step Three: Paint the Dragonfly Fan Blades
So now that your prep work is done, you can start decorating your fan blade dragonfly. If you use the chalk-based paint, then start with a thin coat. You don’t need to worry about getting every spot covered. This paint can be kind of thick, so a thin coat to start will help your pieces look smooth when covered.
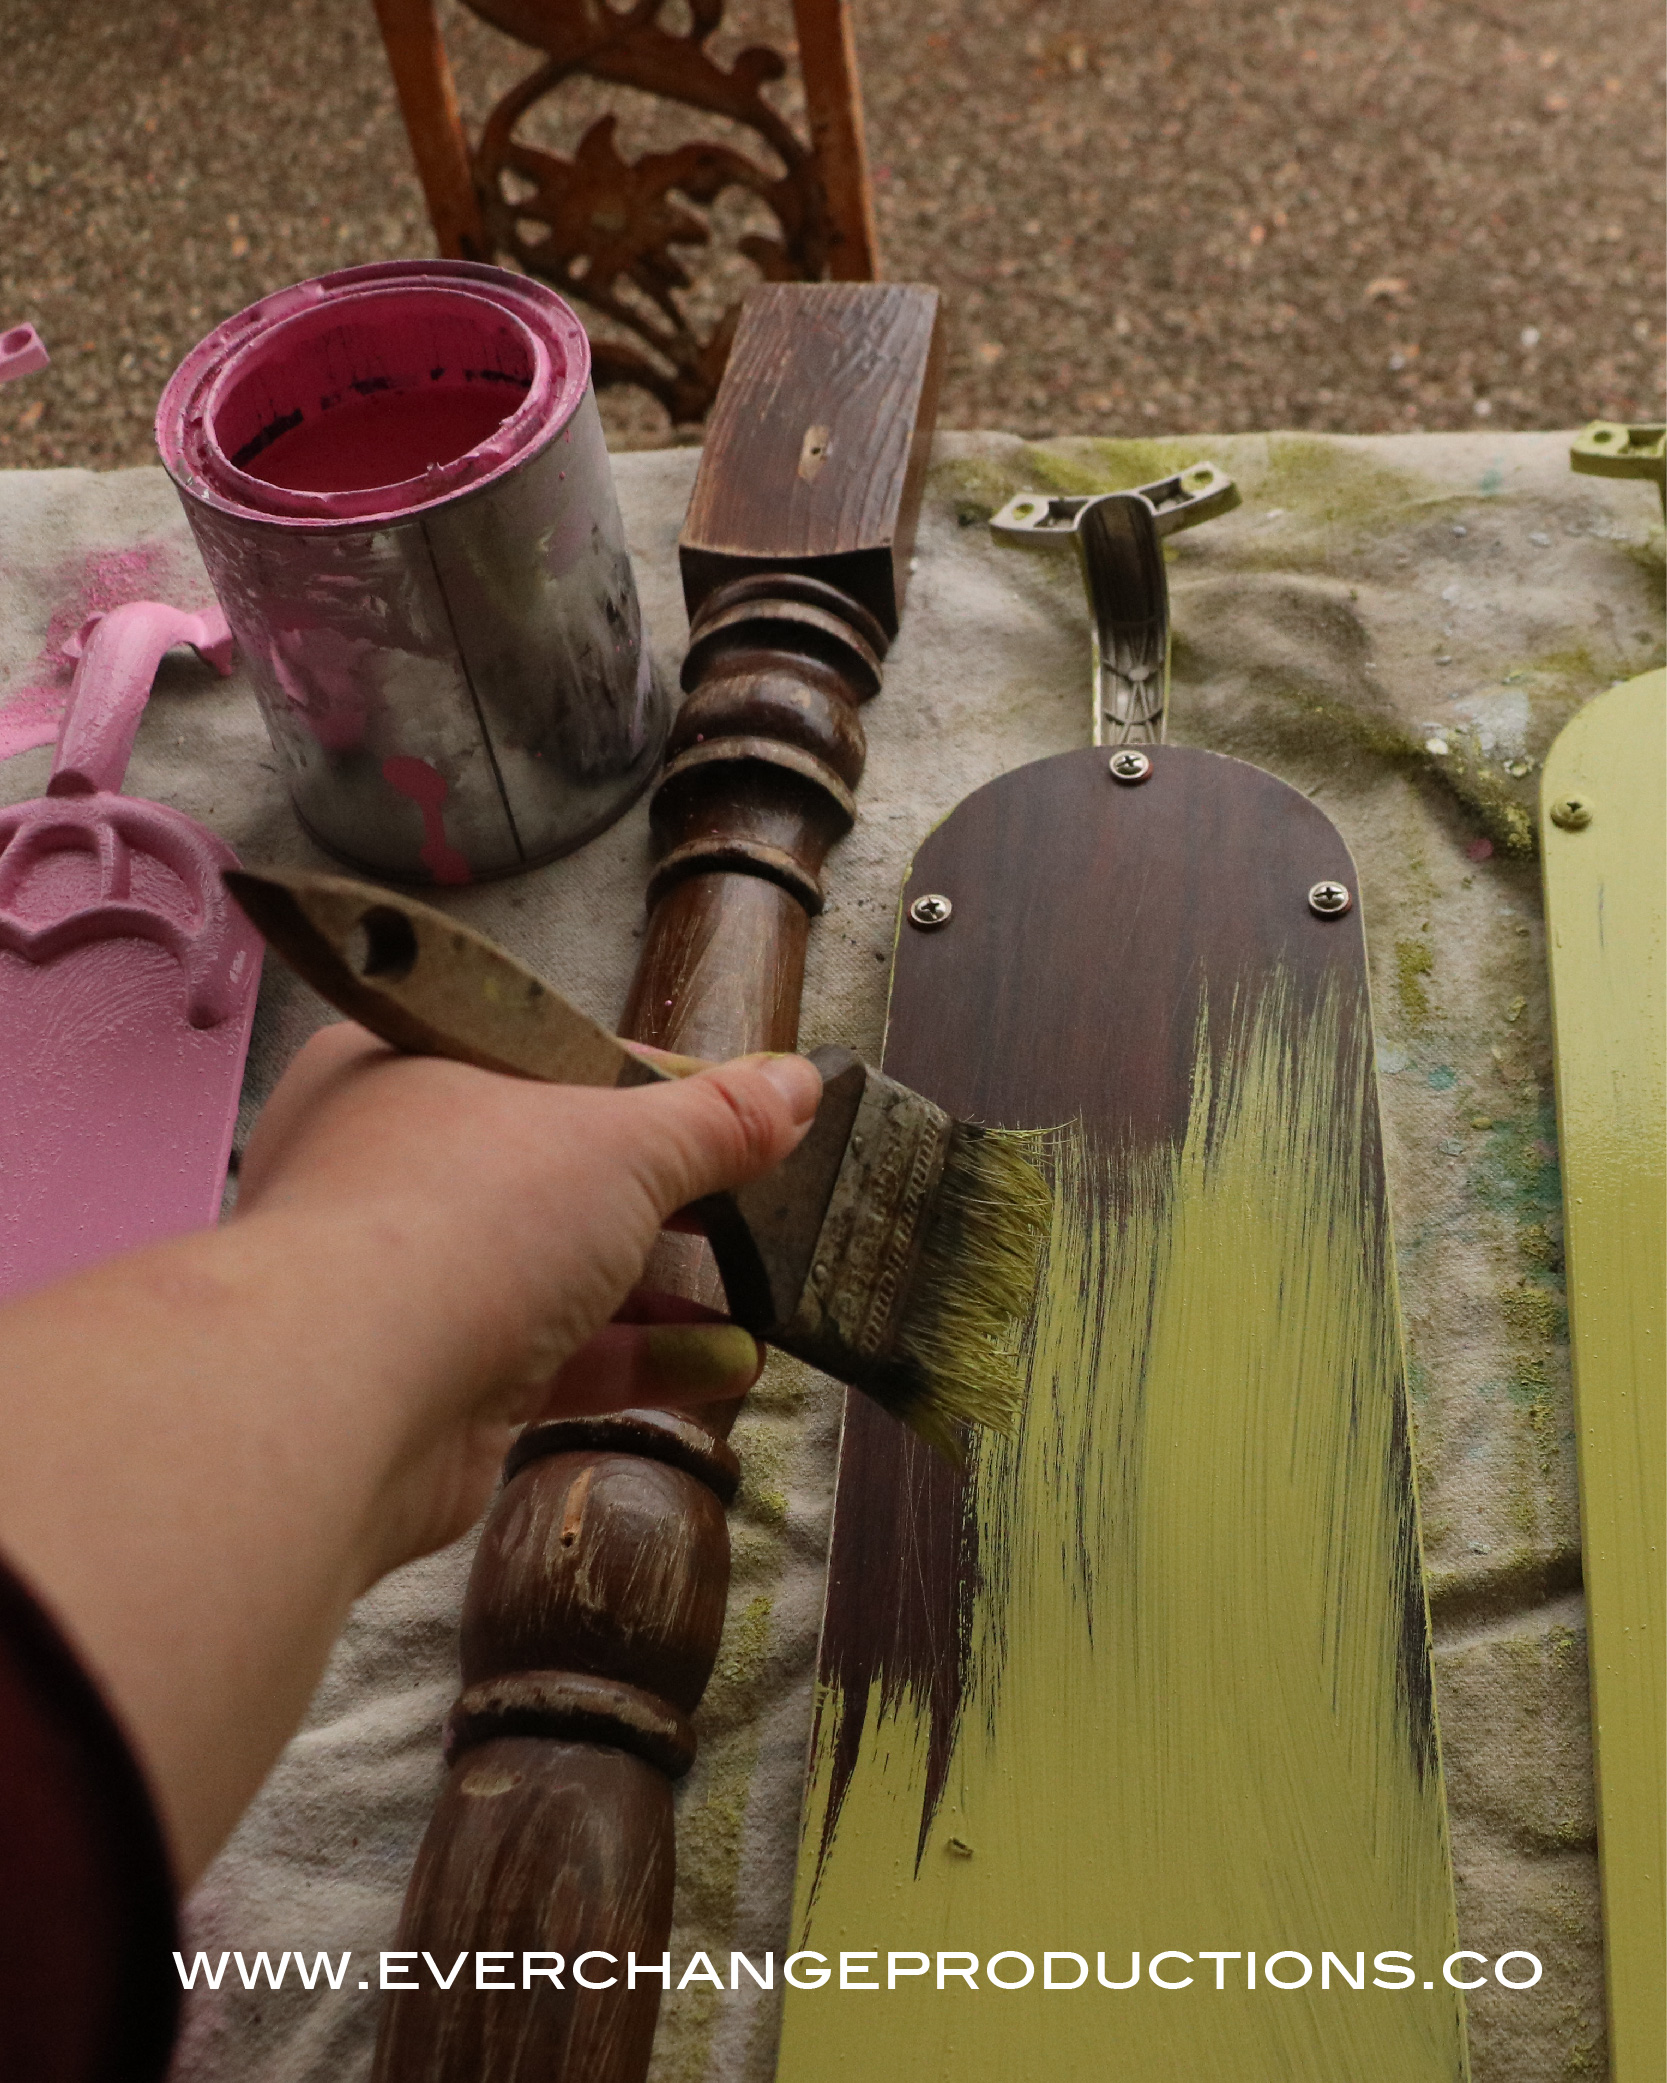
Step Four: Sand and Repeat
Once you’ve finished painting the first thin coat for your fan blade dragonfly, you’ll wait for the pieces to dry. Then lightly sand the paint and add a second coat. This is important for a smooth finish of chalk-based paint.
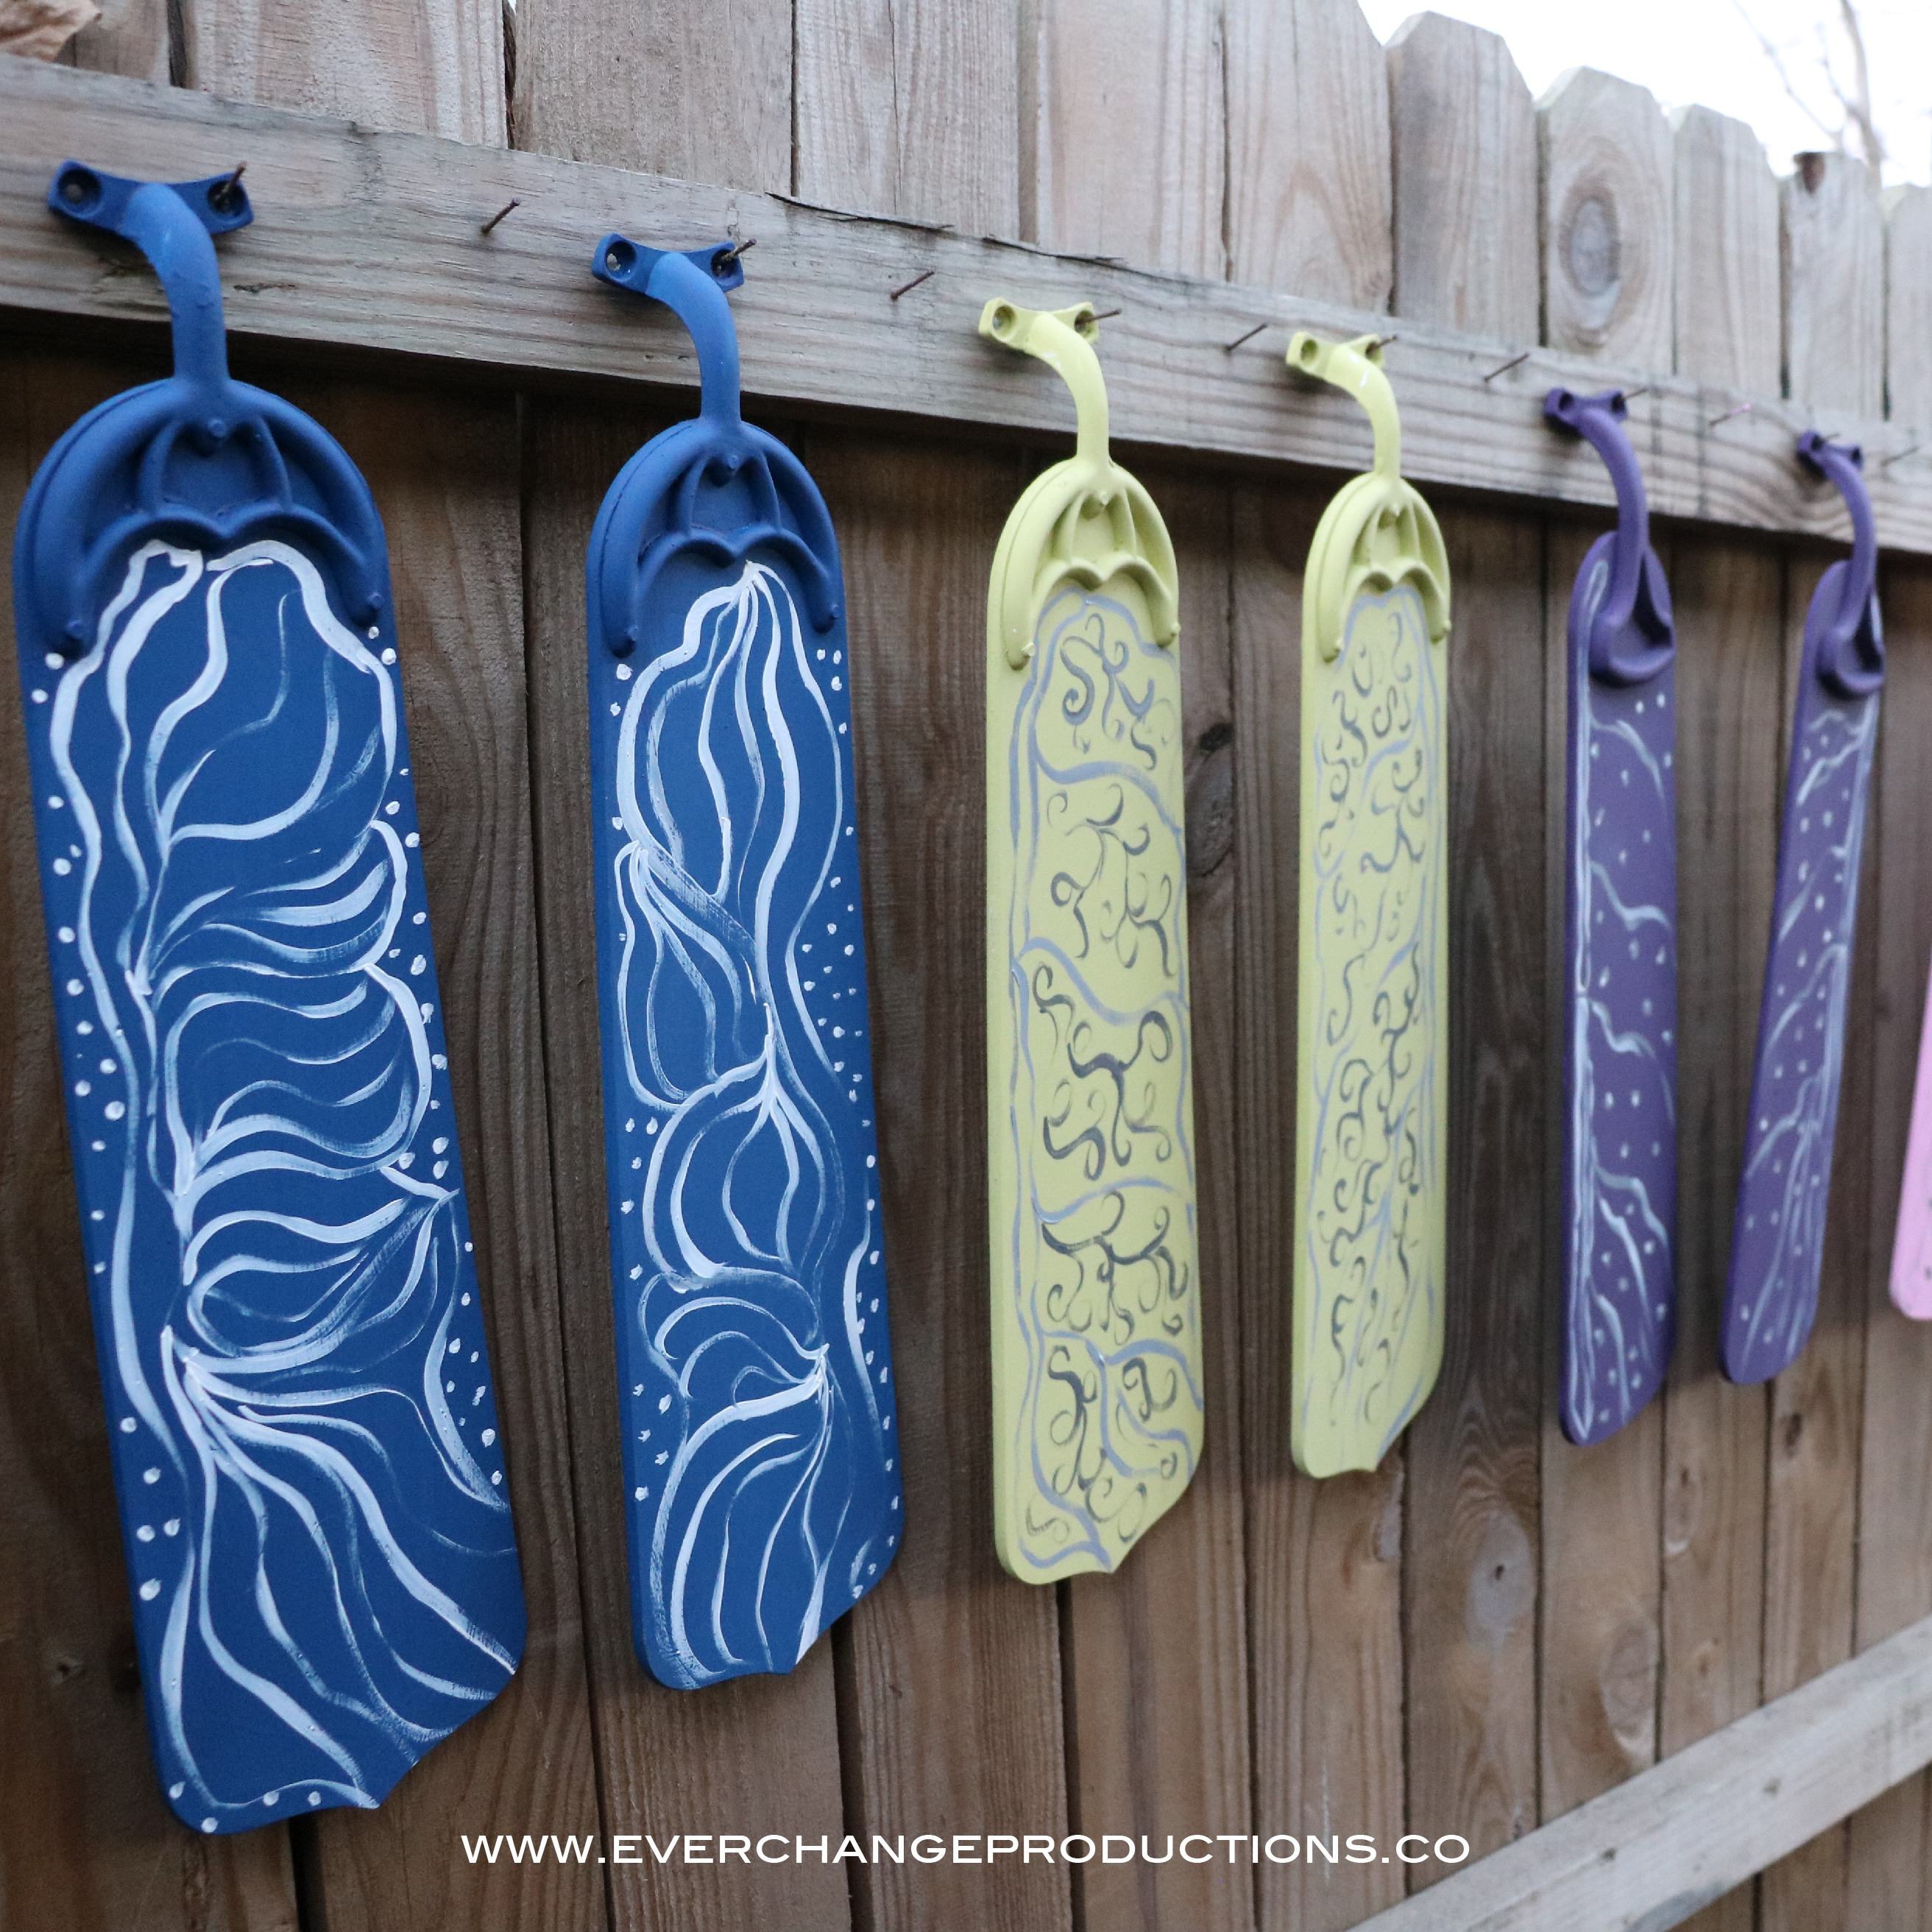
Step Five: Final Touches
So once you are happy with the paint coverage, you can decorate the fan blade dragonfly with any additional designs. I used acrylic paint for this, but I’m not sure how well it will stand up outside.
Step Six: Assemble Fan Blade Dragonfly
You’ll need at least 8 screws for each dragonfly. I predrilled holes in the front of the body and then screwed in the holes through the holes in the fan blade hardware. It was pretty simple and when placed in the thickest parts of the body, it was sturdy.
Since all the table legs and spindles are different, you sometimes have to play around a little with placement of the wings in order to get the most surface area to screw into.
You can also experiment with adding different materials for eyes and antennas. Although I had wished to find something to make a rounder head, I never could find what I was looking for and I chose not to attach eyes or antennas, but this project is easy to customize to fit your flavor.
Step Seven: Display the Dragonfly Yard Art
I think these look adorable on a wooden fence. For that we, pre-drilled holes in the wings and bod through the fence and then screwed them in. But we also hung some up on chain link. For that we simply used zipties and tied them around the wings through the fence.
And that’s it! You now have the key to making your own dragonfly garden decor. For more repurposing ideas, check out the repurposed project section of this blog. Please, feel free to show us pictures of your designs through the InLinkz option below for a chance to win the Upcycle Sharin‘ contest. The winners will receive Fiskars PowerGear2, Softgrip Pruner, Fiskars PowerGear2 Lopper, and Fiskars PowerGear2 Hedge Shears, which is over $100 in value. The patented gear technology multiplies leverage to give you up to 3X more power on every cut.
I’ll also share my favorites on my Facebook page Upcycle Warrior for others inspirations.
Don’t forget to pin this repurposed dragonfly yard art for later!
So cute! I’ve been wanting to make a dragonfly for a while.
[…] Dukes and Duchesses | Exquisitely Unremarkable | Sadie Seasongoods | Ever Change Productions […]