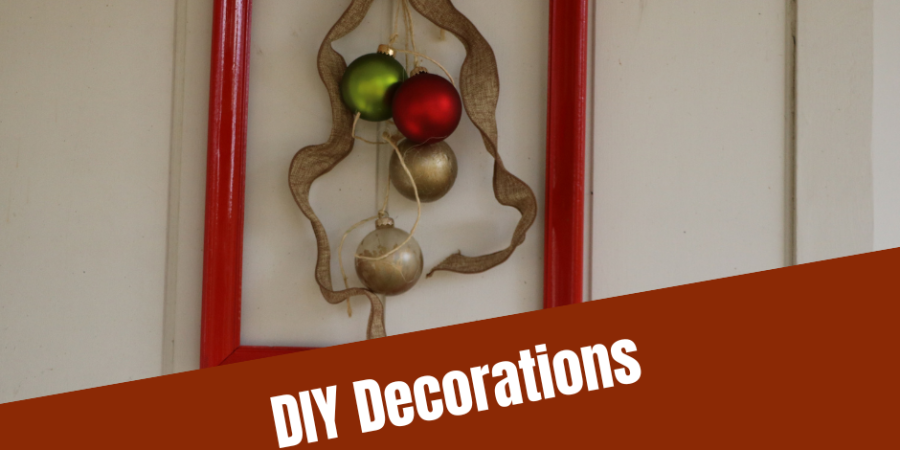
Christmas DIY Decorations
We are on round two of our handmade Christmas with DIY decorations. Our last post featured decorations made from leftover project materials or stuff we had around the house. This week, we continue the same theme with our Picture Frame Wreath and Hand-Swirled Ornaments.
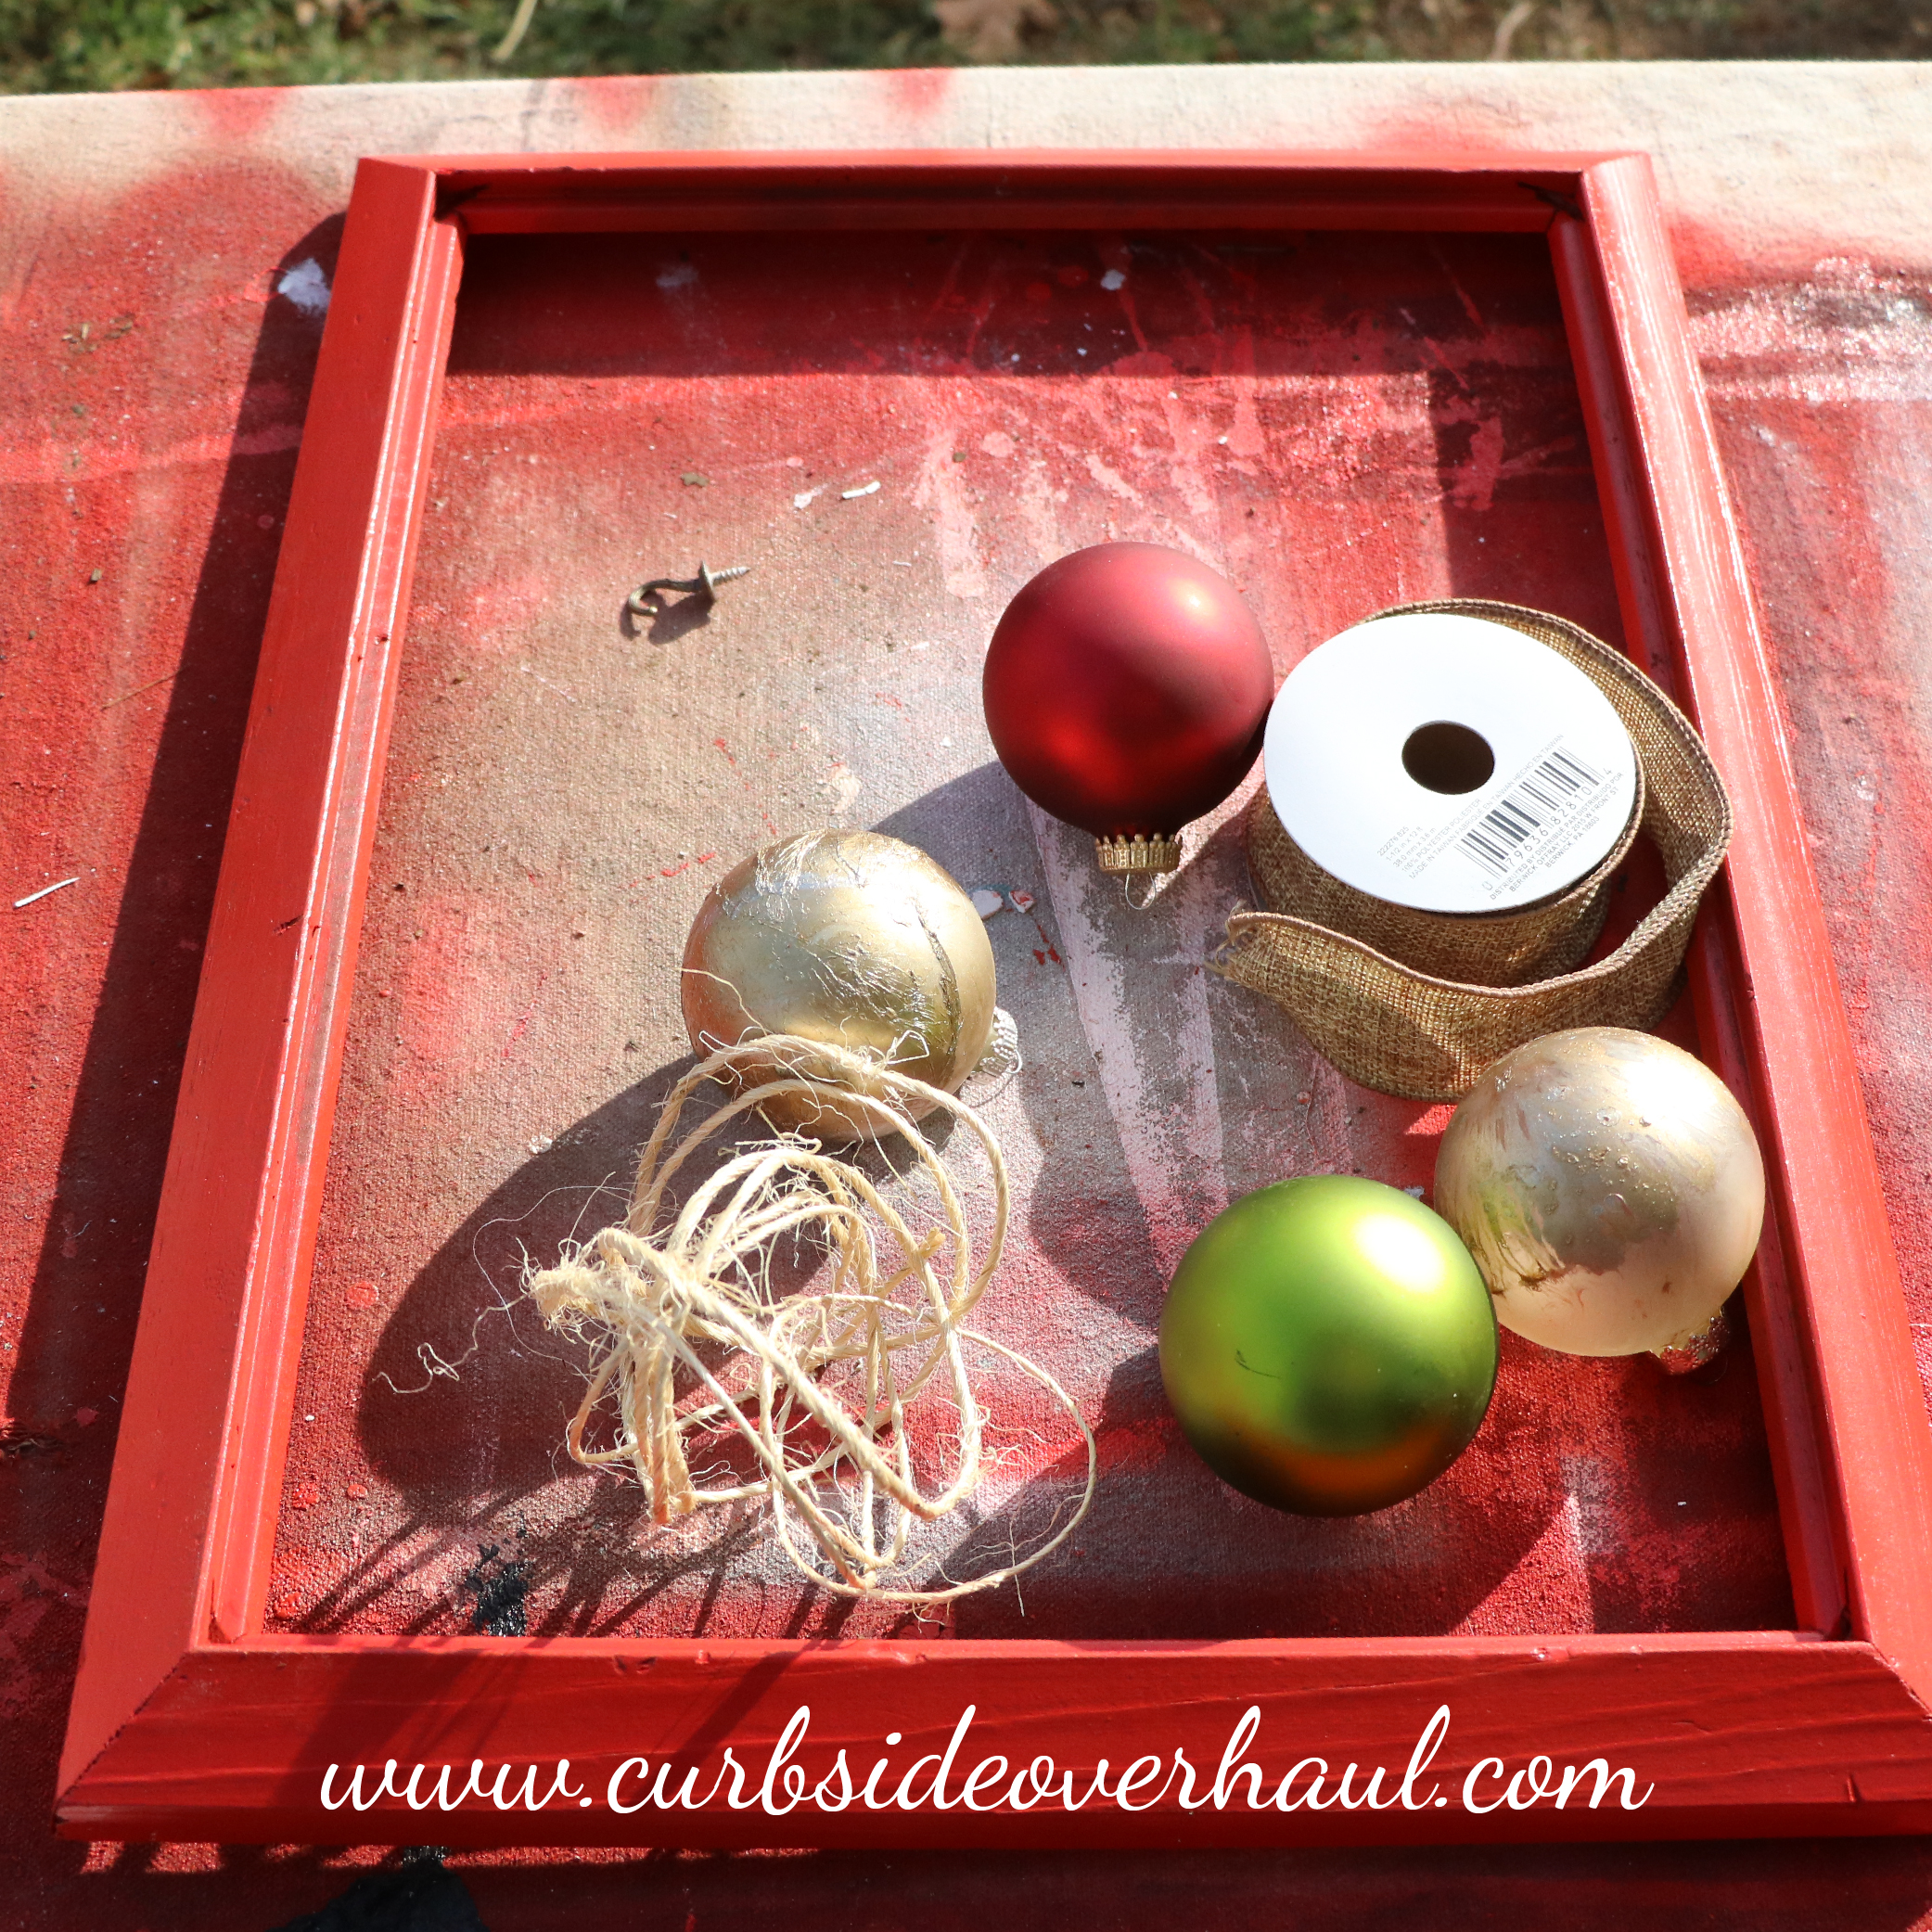
Materials Needed:
Frame
Clean Slate
Spray Lacquer
Bright Idea
Clear or White Christmas Ornaments
Ribbon
Jute Twine
Bucket of water
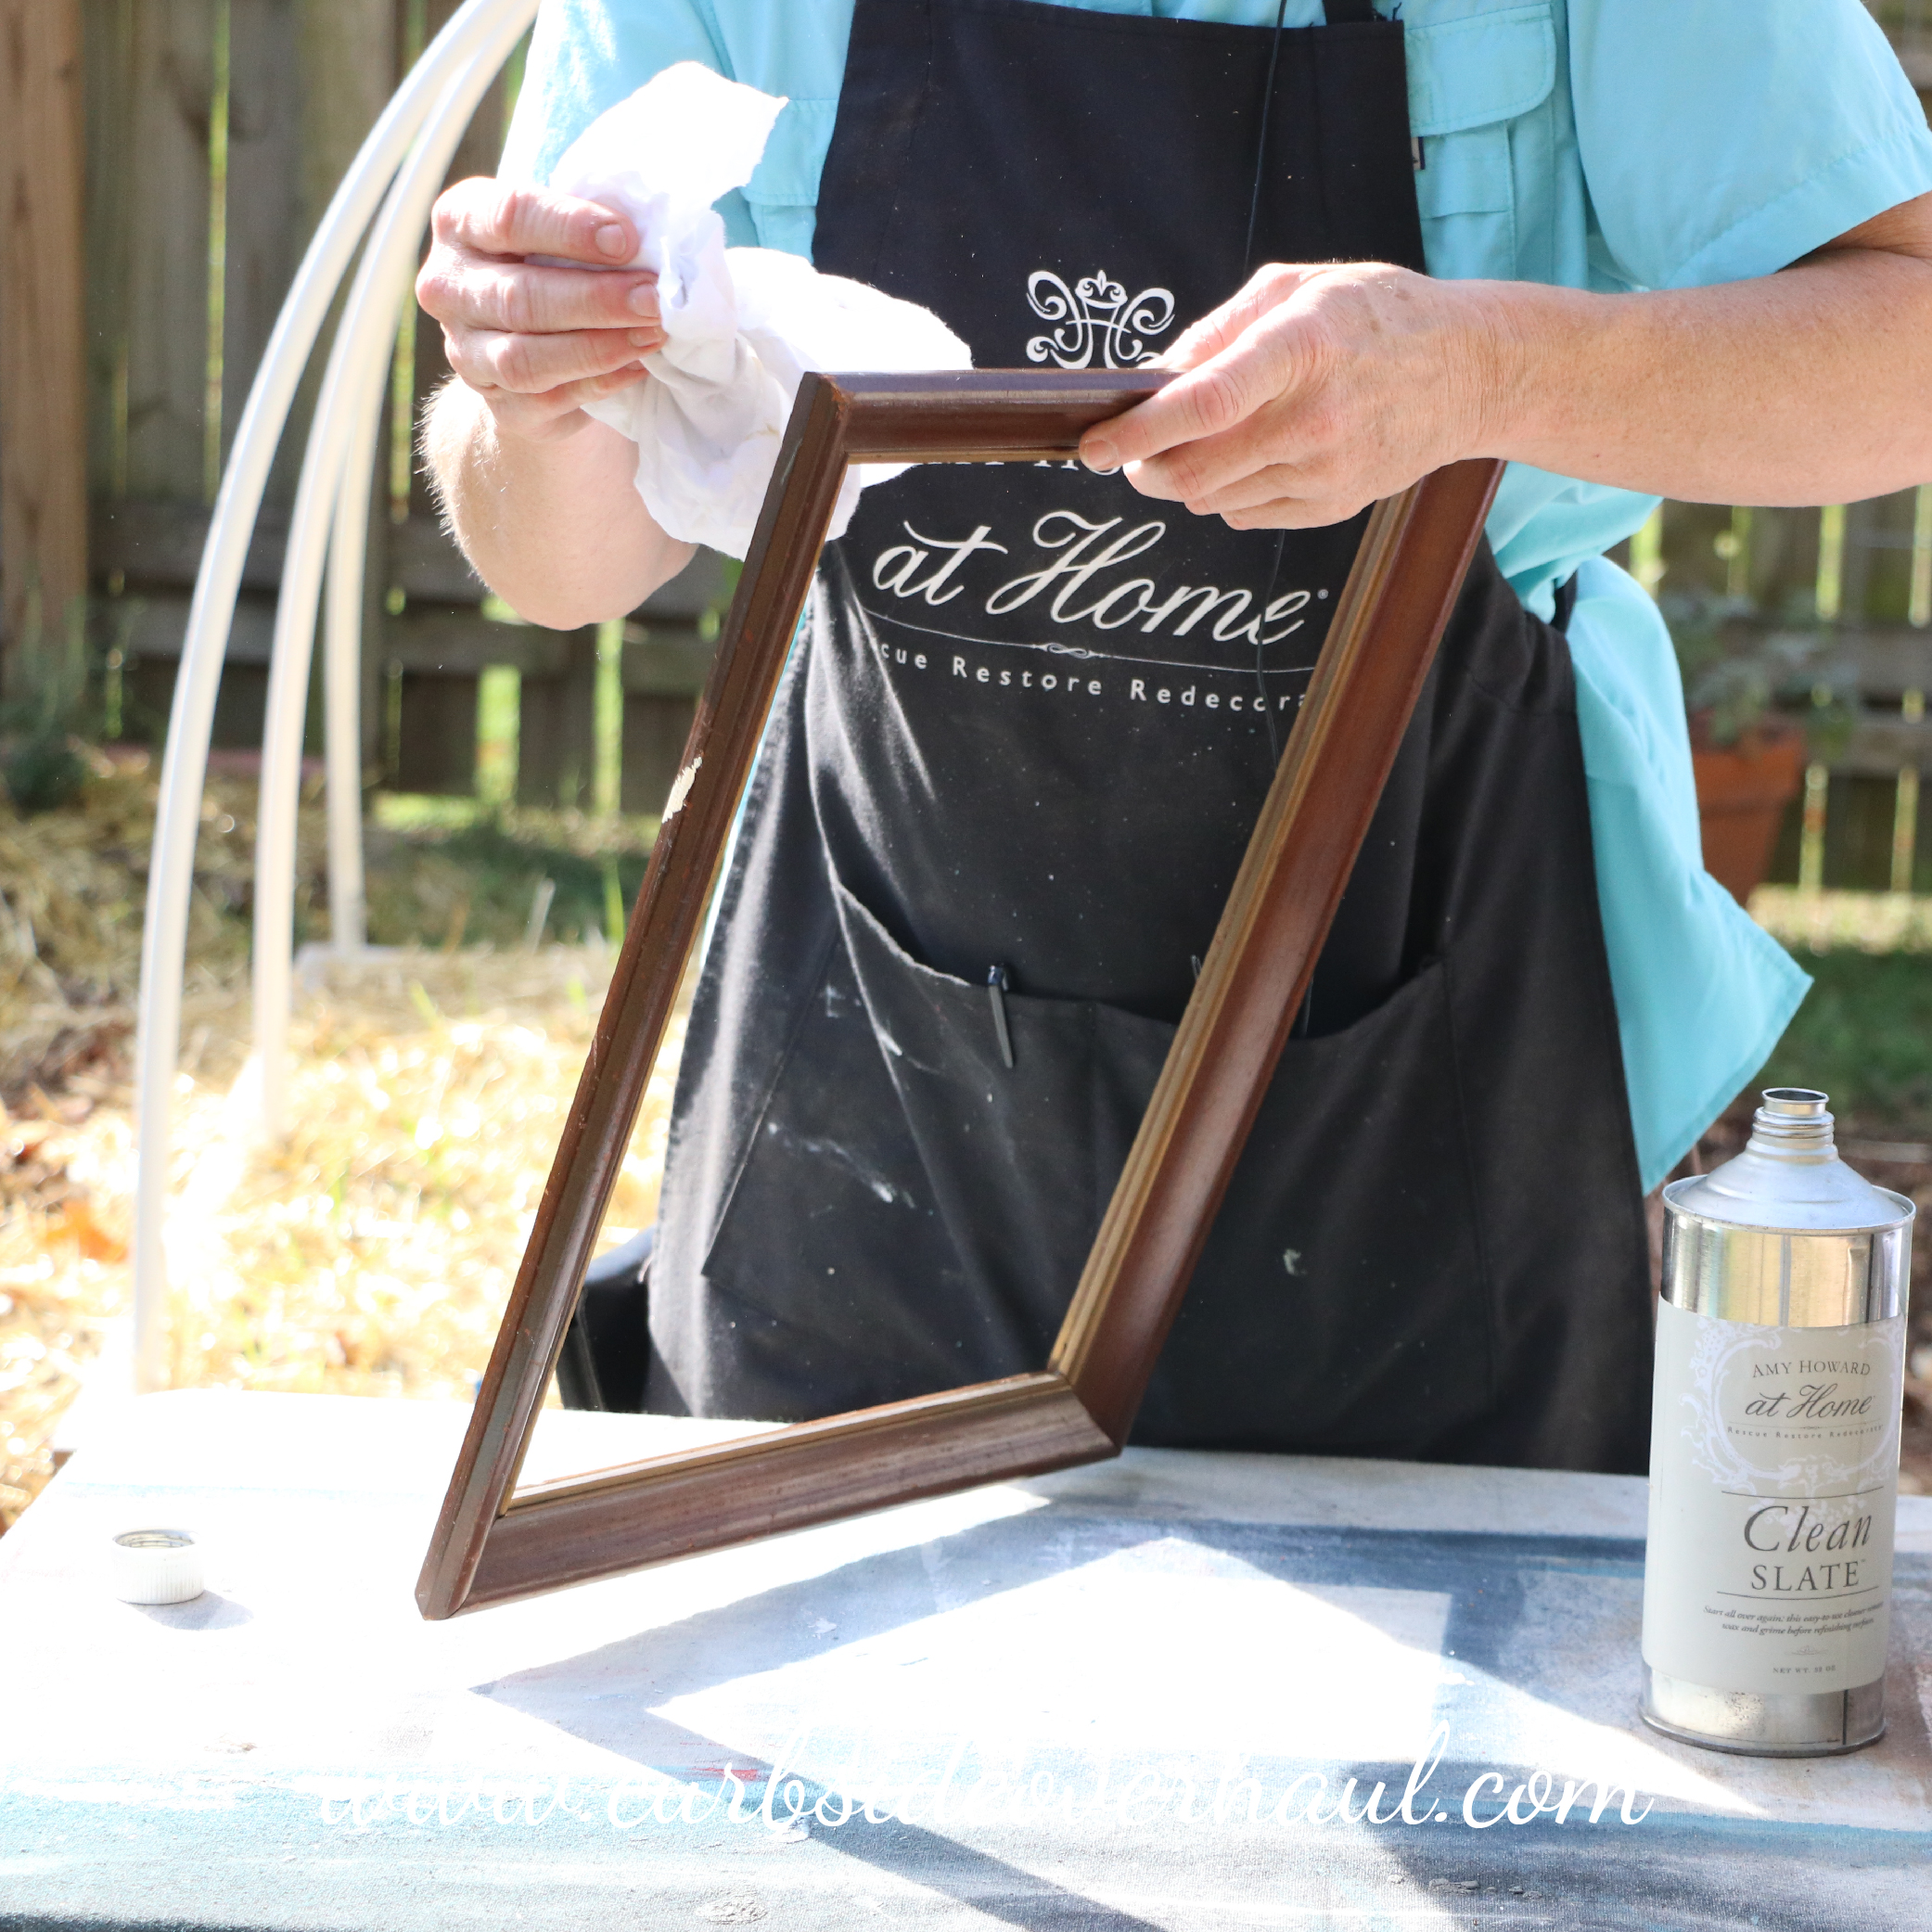
Step One: Clean with Clean Slate
Start with your frame, wiping it down with Clean Slate to get rid of all the dirt and grime.
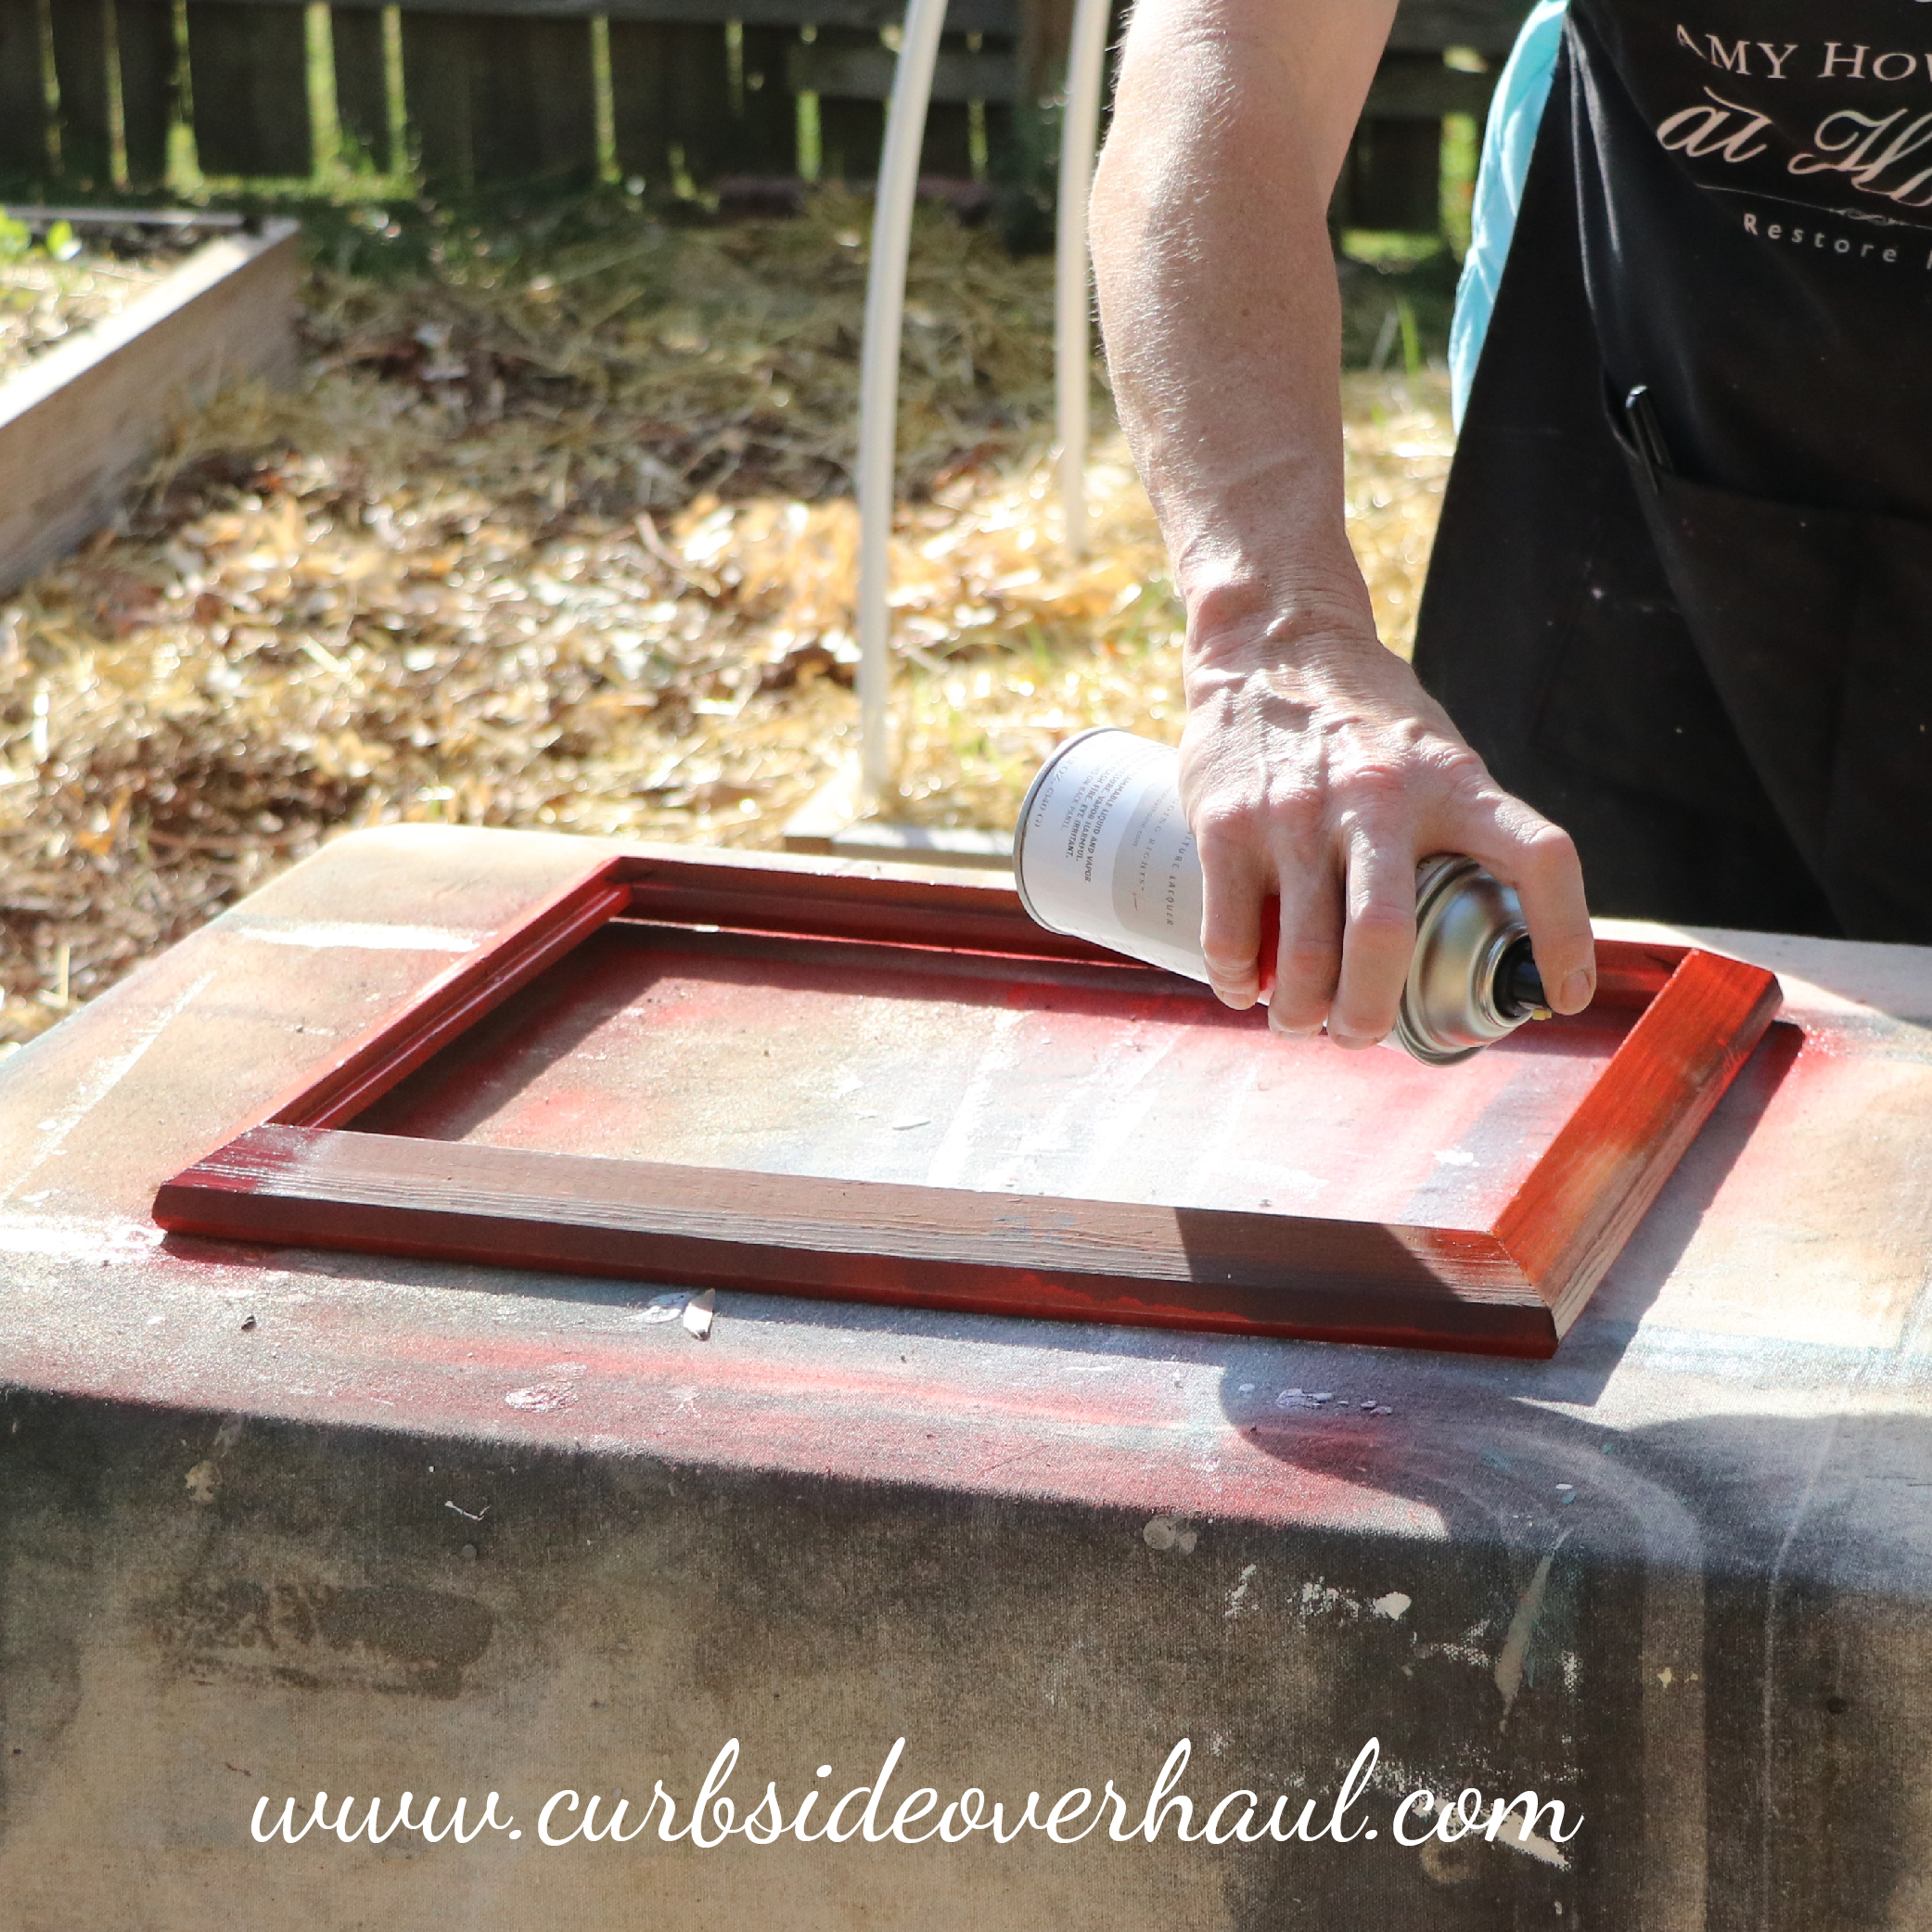
Step Two: Paint with Spray Lacquer
Shake your spray lacquer then start at the top of the frame and work your way down with long clean strokes. We used Brisson Red Spray Lacquer to get this shade of red. This will take several coats, so do as many coats as it needs to have even coverage, sand lightly between each layer and wipe with a damp cloth. Then finish it off with a coat of Bright Idea clear lacquer. This clear lacquer will serve as a protective cover for your piece.
Step Three: Make Hand-swirled ornaments
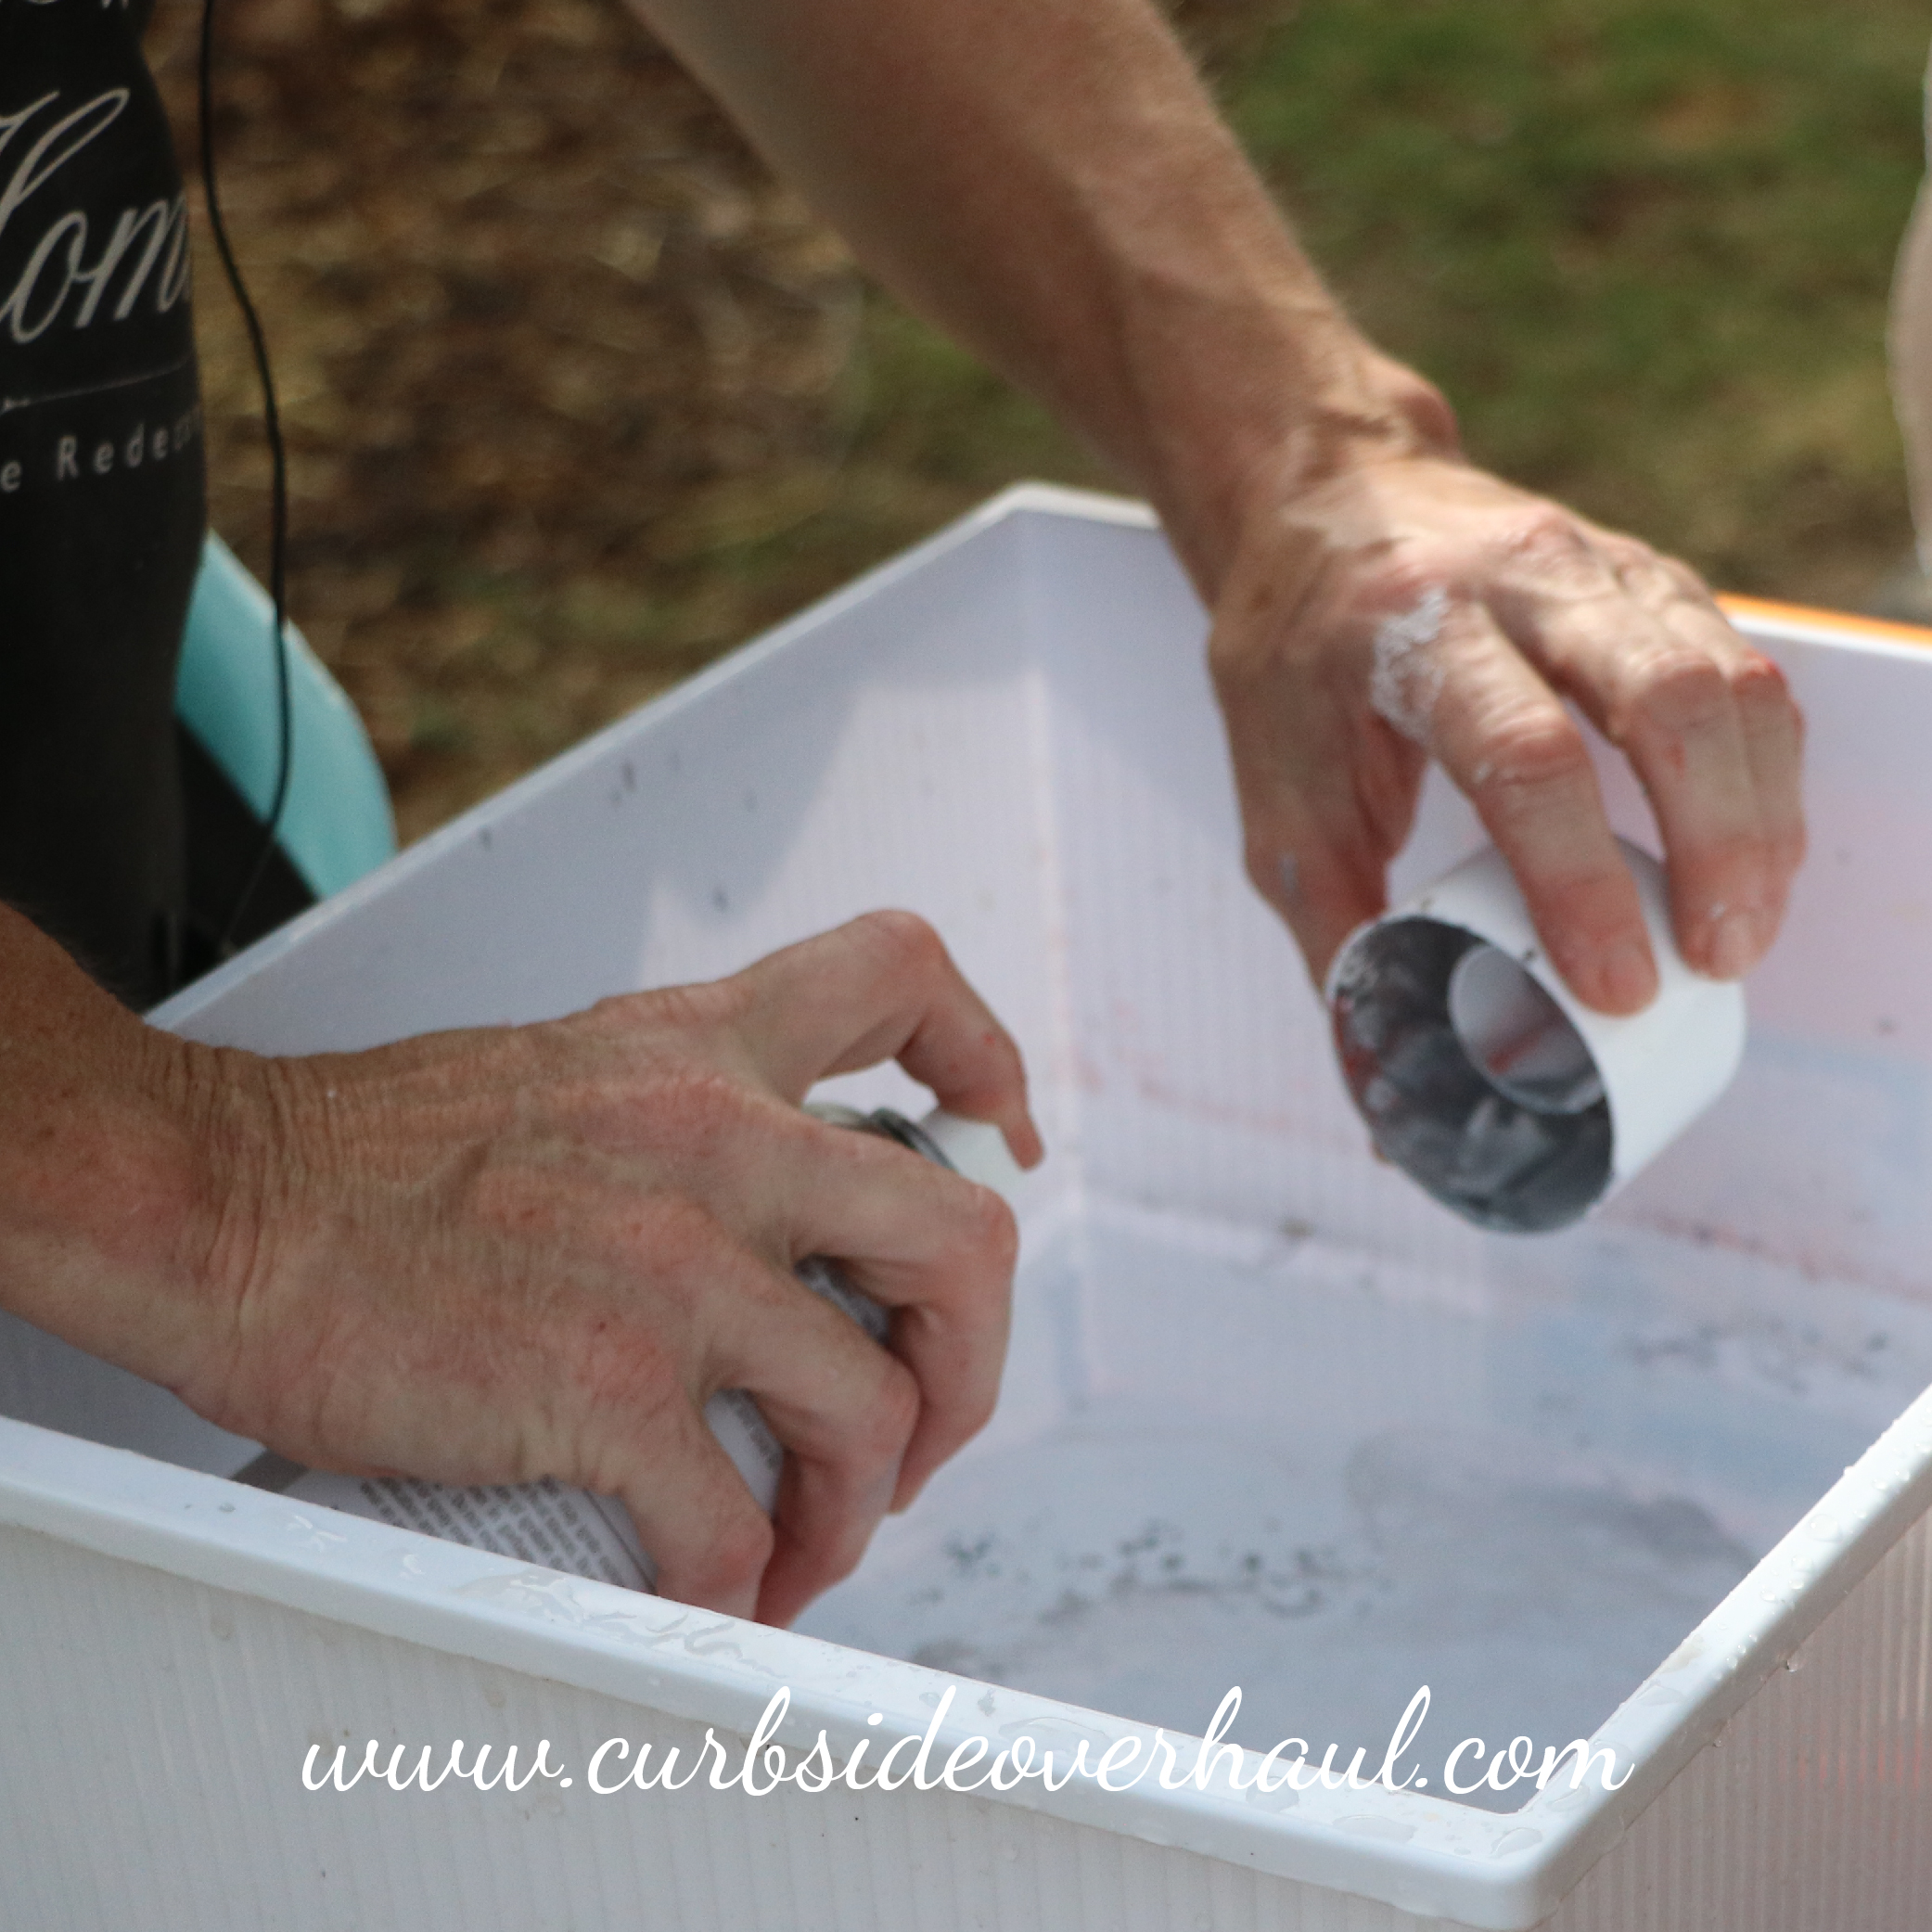
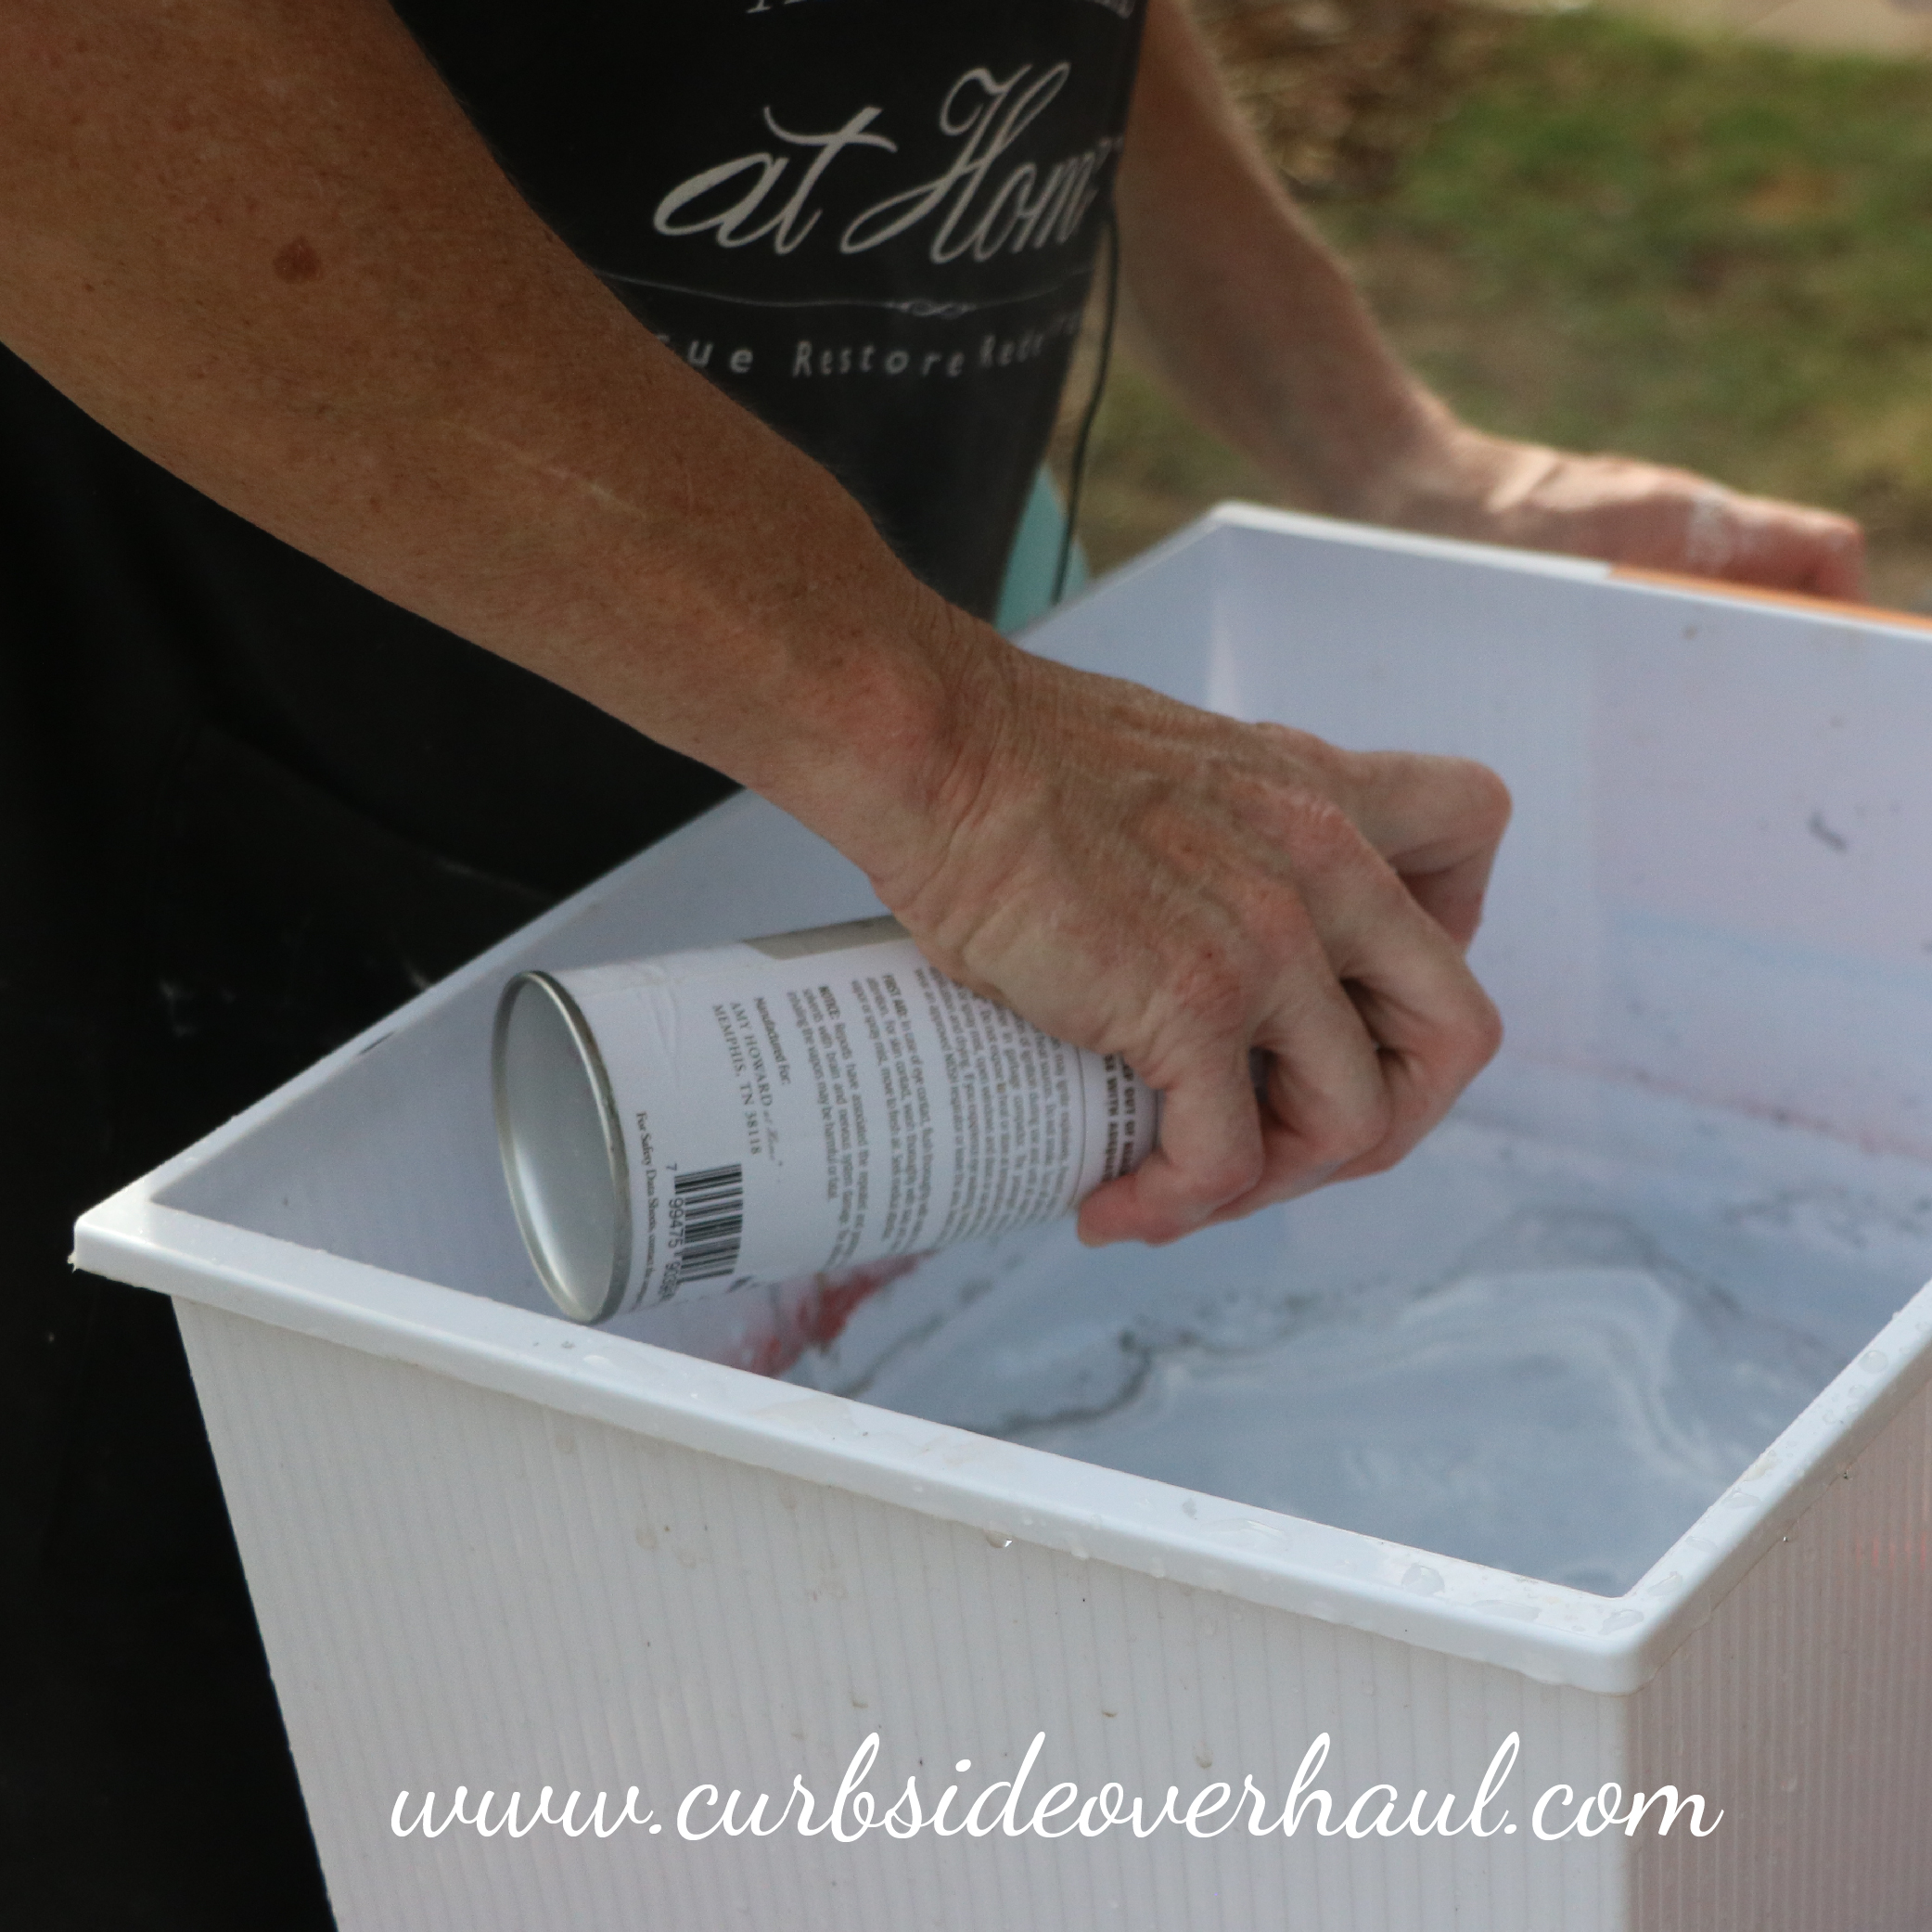
After after you wipe down your ornaments with Clean Slate, you’re ready to hand-swirl your ornaments. You can do this a number of ways. You can either fill your spray lacquer lid and then pour the spray lacquer into a water. Or you can you spray the paint right into the water. Immediately, the lacquer will start to harden and make a stretchy consistency. You can experiment to see what textures you like better. Times can vary between immediately dunking the ornament and waiting about about 10 seconds.
Step Five: Experiment
There is a variety of different methods and techniques for this. No two ornaments will be the same. You can delay the time before you dip the ornaments. Other options are increasing the time the ornament is under the water before you pull it up, twisting the ornament as you pull it from the water or you can use different colors or multiple layers of different colors.
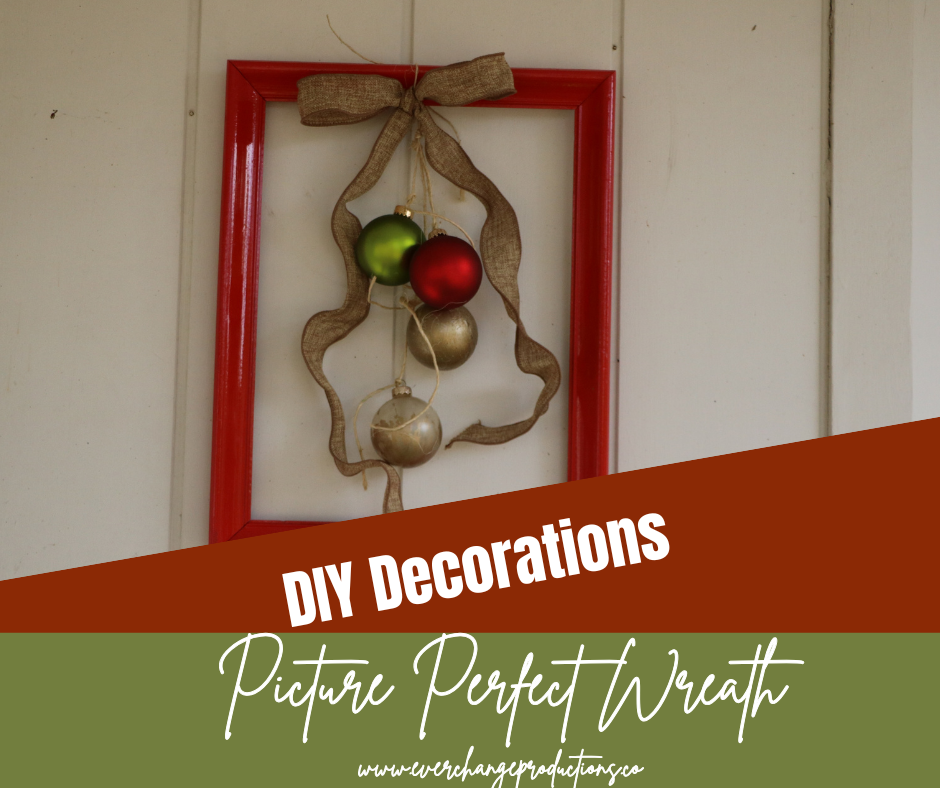
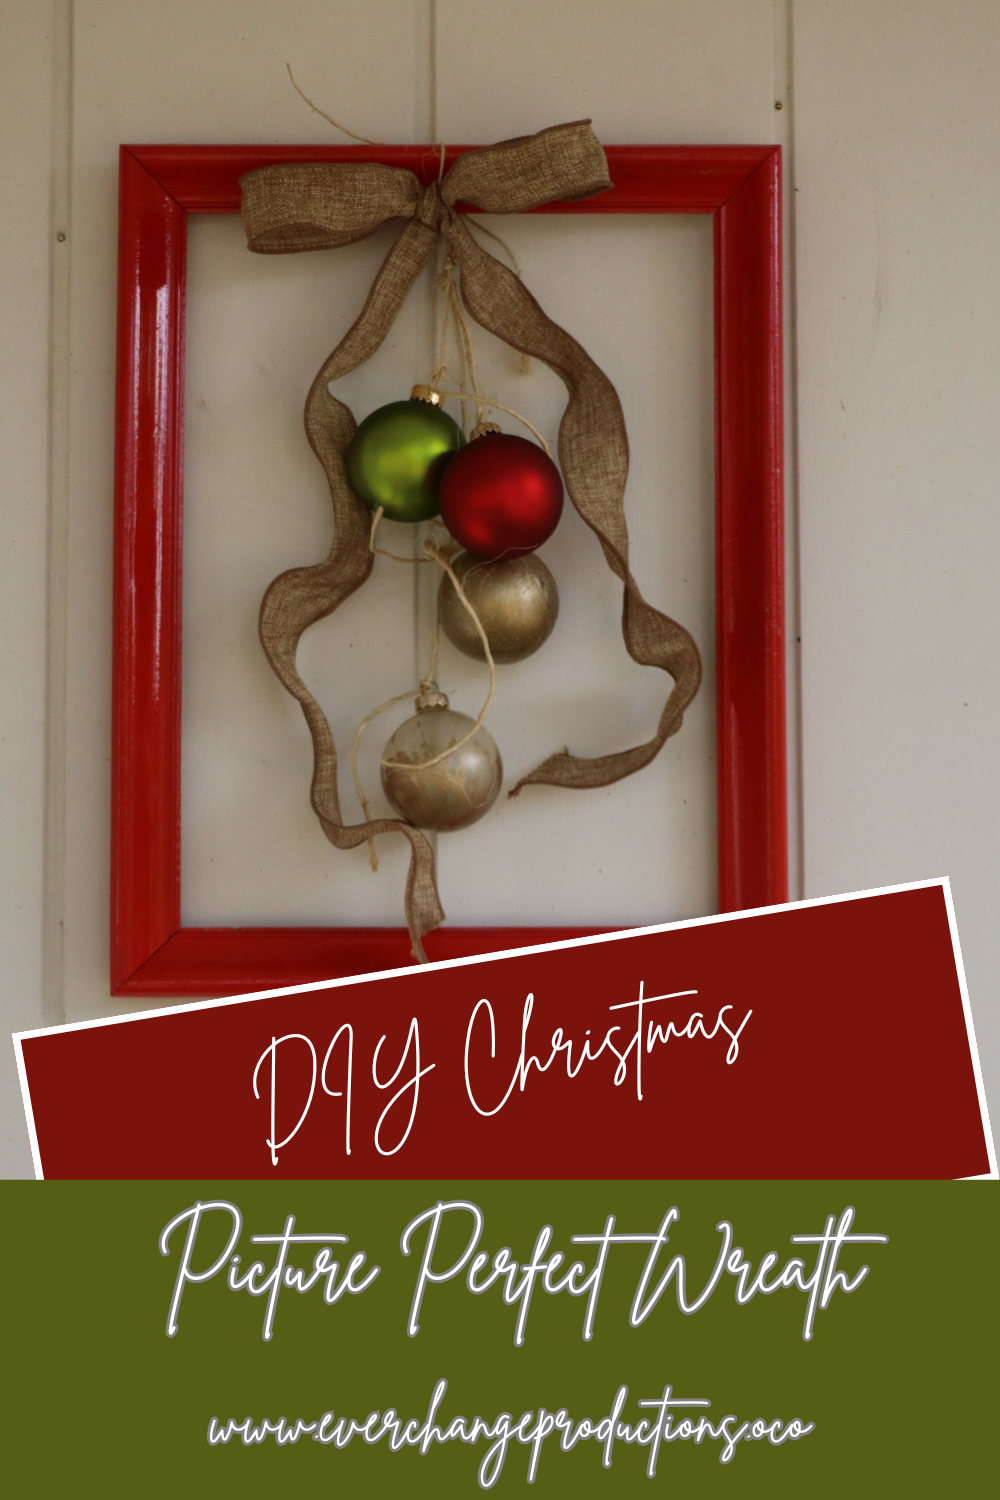
Step Six: Put Your Picture Perfect Wreath Together
Once you have your ornaments ready, we chose two painted ones and two plains ones, you can start putting together your wreath. Tie a piece of jute string around the ornament hanger and tie it to the top of the frame, using various lengths of string.
Step Seven: Make a Bow
Add a bow to complete your picture perfect wreath.
And there you have it! Another DIY decoration to add to your Christmas decorations or gift to someone else.
For more posts to get you in the Christmas spirit, check out these additional blog posts.
How to Have A Stress-free Holiday- Ever Change Productions
What do I get my Daycare Kids for Christmas? – Little Sprouts Learning
Why I Start Celebrating Christmas Before Thanksgiving (and a FREE playlist)-The Peculiar Treasure
HAVE A RELAXED, ORGANIZED CHRISTMAS – Even if You’re Not- Home Again Jiggety Jig

[…] DIY Decorations: A Picture Perfect Wreath- Curbside Overhaul […]
Oh my gosh, these are so cute!
Thanks!
[…] Christmas DIY Decorations […]
[…] DIY Decorations, Picture Perfect Wreath […]
That is the cutest idea! I never would have thought of that!
Thank you! It’s tons of fun too!
[…] Christmas articles: What do I get my Daycare Kids for Christmas? How to Have Stress-Free Holidays DIY Decorations: Picture Perfect Wreath Good Deeds Your Kids Will Cherish During the Holidays Why I Start Celebrating Christmas Before […]
[…] DIY Decorations: Picture Perfect Wreath – Curbside Overhaul […]
I absolutely love this picture perfect wreath! Beautiful! Also, I’m a big fan of burlap and jute!
Thank you! We love burlap and jute too. We love mixing the rough with smoother or shiny textures, too.
This is adorable. Is the “clean slate” similar to TSP? I’ve used that before. That swirly technique is pretty cool. The ornaments look mighty fine! I never thought of painting ornaments. We’ve been looking for deep “Duck Green” ornaments to add to our rustic theme at church!
I’m not sure about TSP, but we often recommend Simple Green. Clean Slate is a bit easier because you don’t have to worry about diluting it or wiping it down with a wet rag to get rid of surfactants. I’m not sure if we have a duck green shade, but we do have Easton Green and Citron that you might take a look at. If you do the projects, make sure to send us pictures!
This is so beautiful! What a way to reuse an old picture frame. Thanks for sharing on the Waste Less Wednesday Blog Hop!